Drafts
Creating an operation is a relatively complex multi-step procedure, so we provide a Drafts screen where you can edit or create new operations before submitting them.
Drafts are saved automatically and allow you to resume your work later if needed. Saved Drafts are accessible by anyone with access to the application's Operations. This allows multiple users to edit the same draft, e.g. one user from the security team configures the parameters and risk rules, another user from the marketing team defines the messages shown to the user in the same operation draft.
There are two types of drafts: New Operations and Edit Operations. The toggles allow you to switch between these two types when using the Drafts.
Drafts appear under New Operations when you press the + New Operation button to create a new operation. Drafts appear under Edit Operations when you press the pencil button to edit an existing operation.
Creating a new operation
Step: Basic Settings
In this screen we define the basic settings for the operation. The first thing to notice here is the internationalization support through the Languages field. If you define multiple languages, TrustFactor will check if the end-user's device is in a language you defined and show the messages accordingly. If the device is set to an undefined language, TrustFactor will fall-back to the default language for the operation.
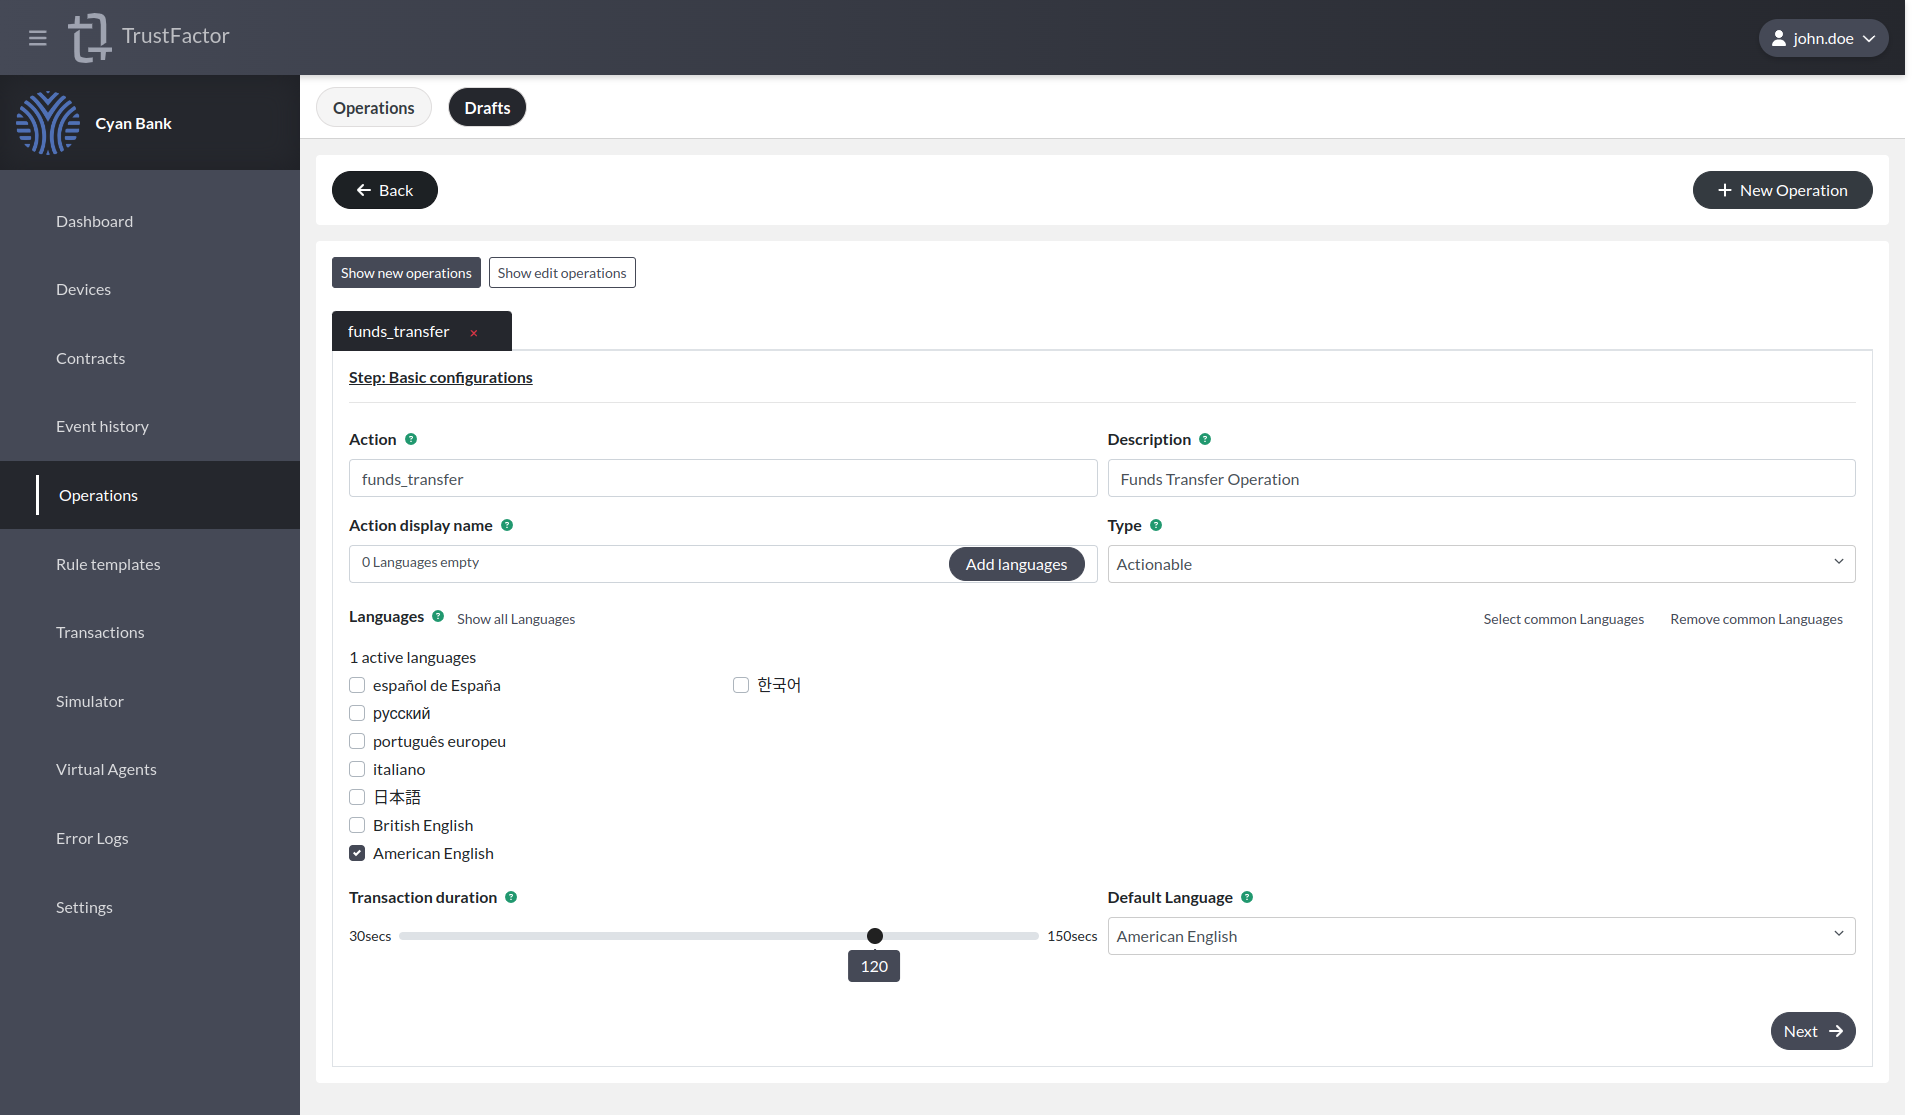
Action
The action field is the identifier for this operation that will be used in the SDK's CreateTransaction methods. Every operation must have a unique Action within the application. This value is not shown to the end-user.
Action display name
This field is the name of the operation as it is shown to the user. We need to press Add languages to set the name of the operation in each defined language.
Description
The description field is used for notes or to describe the operation. This value is not shown to the user and is only readable through the backoffice.
Type
There are two main operation types: Notification and Actionable.
-
Notification:
- This is a fire-and-forget type of authentication request.
- It is used to securely send messages to the end-user's mobile app.
- These messages have only an "OK" button, without "Approve" and "Reject" options.
-
Actionable:
- This type involves transactions that end-users can approve or reject.
- Proper configuration of callbacks is required to receive the authentication request result from the end-user's mobile app.
Default Language
This setting defines the language TrustFactor will default to if the end-user's device is configured in a language that is not set in the Languages field.
Step: Parameters
The Parameters screen is where we define the parameters for the operation and list existing parameters for the operation.
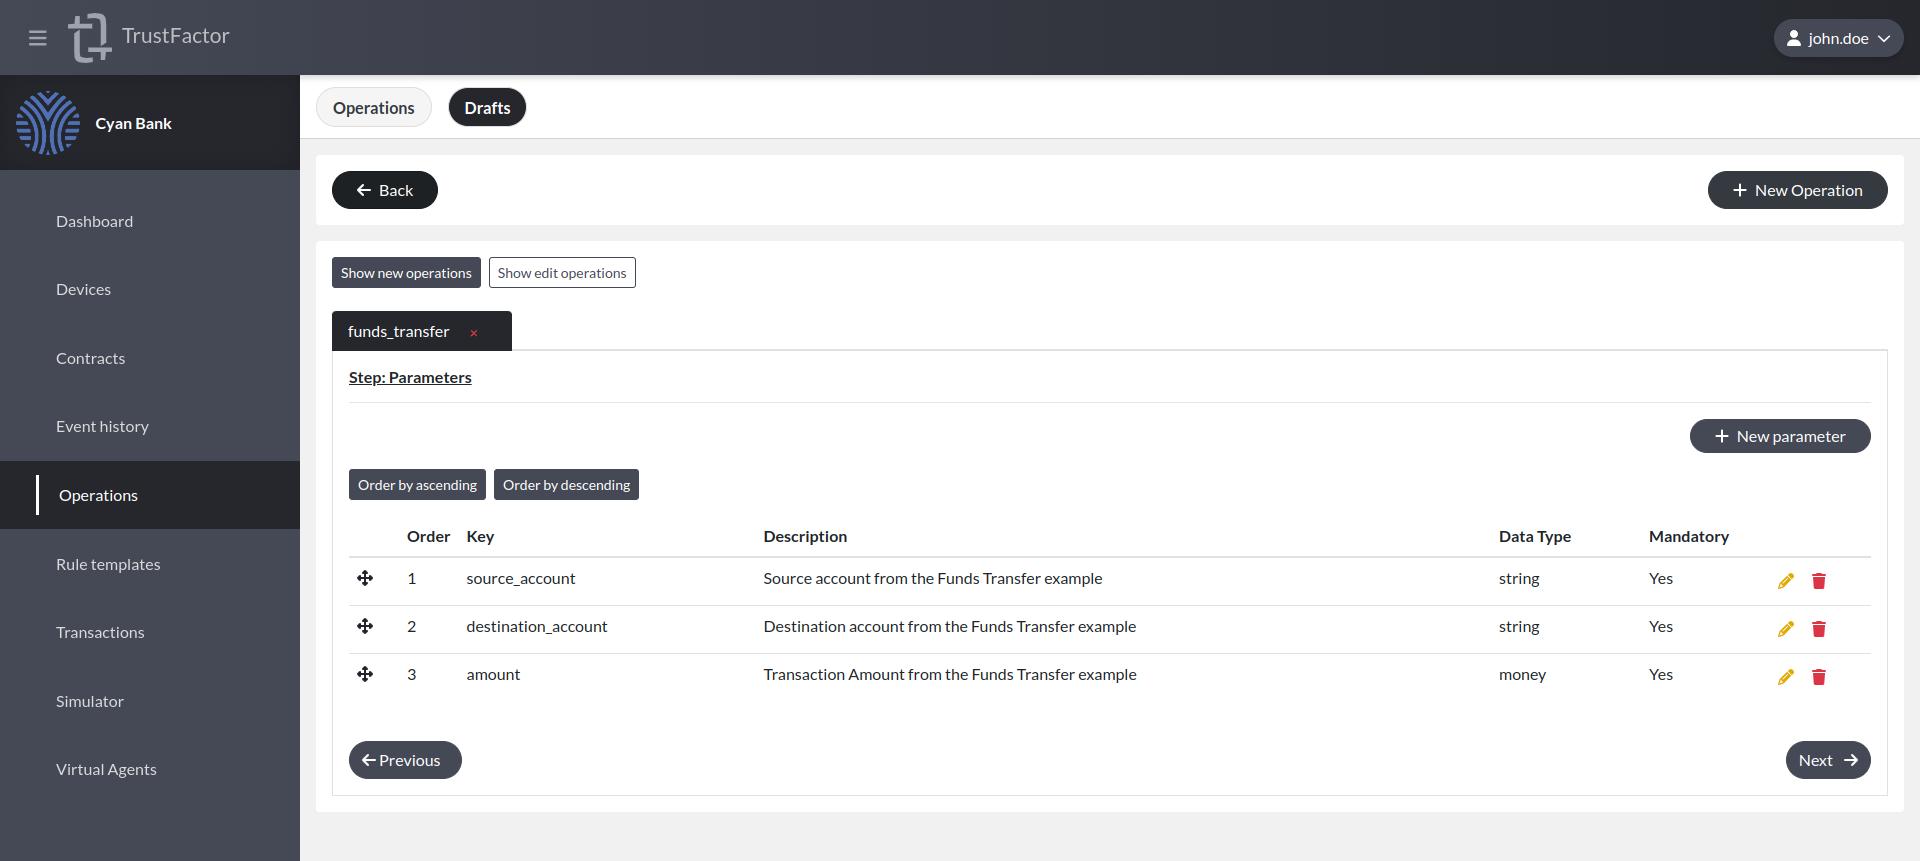
We can create new parameters by pressing + New parameter.
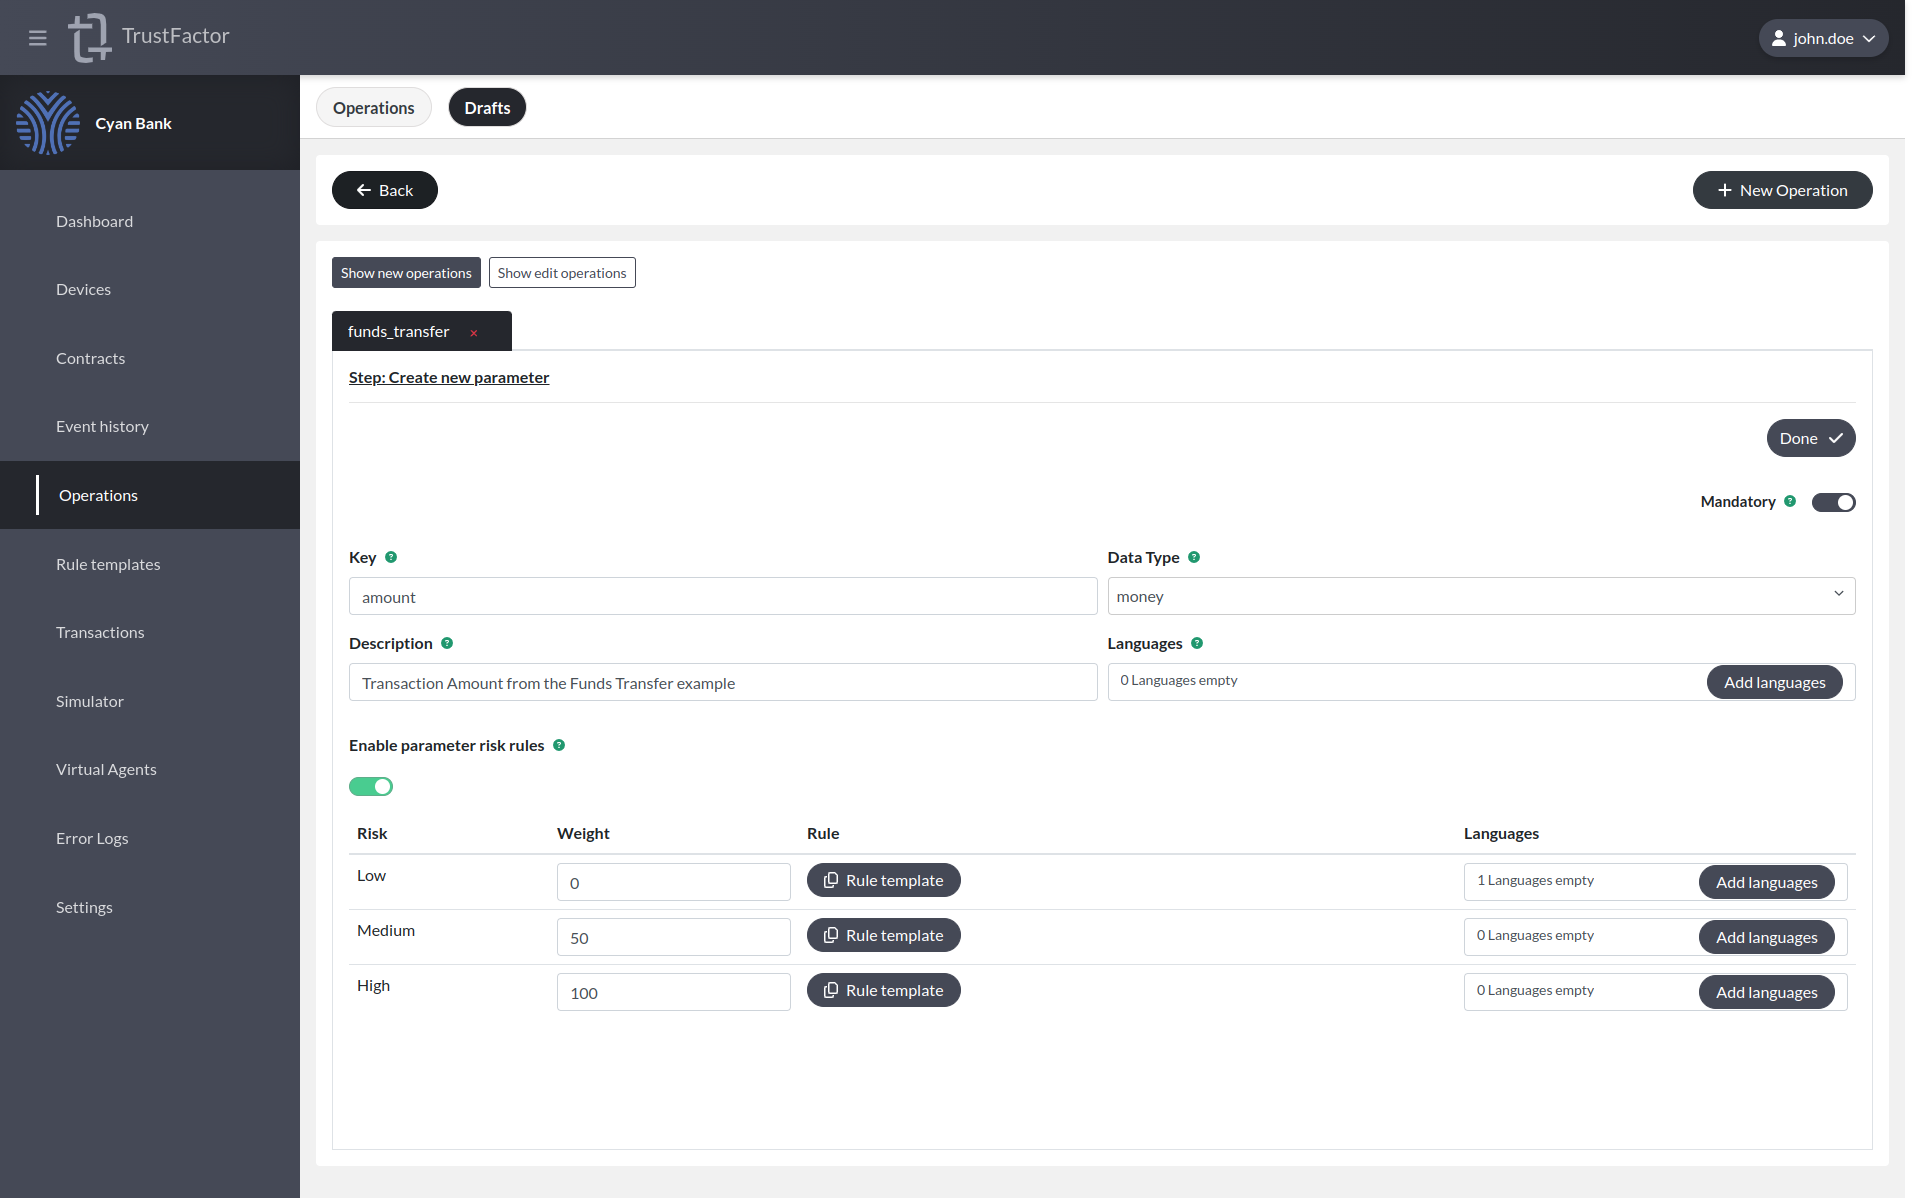
In the new parameter screen you need to define your parameter:
- Key defines the name of the parameter to be used when calling CreateTransaction on the SDK. This is not a translated field and will not be shown to the end-user.
- Data Type defines the data type for the parameter. Parameters can of four different types: boolean, float, money or string
- Description defines a developer-only description much like the operation's description. This is not shown to the end-user.
- Languages is used to define the visible translations of the parameter's name. You have to define the visible name for the parameter in every language you selected in the operation's basic setttings screen.
Assigning Rule Templates
You can also assign risk rules you already created in the Rule Templates to the parameter you are creating.
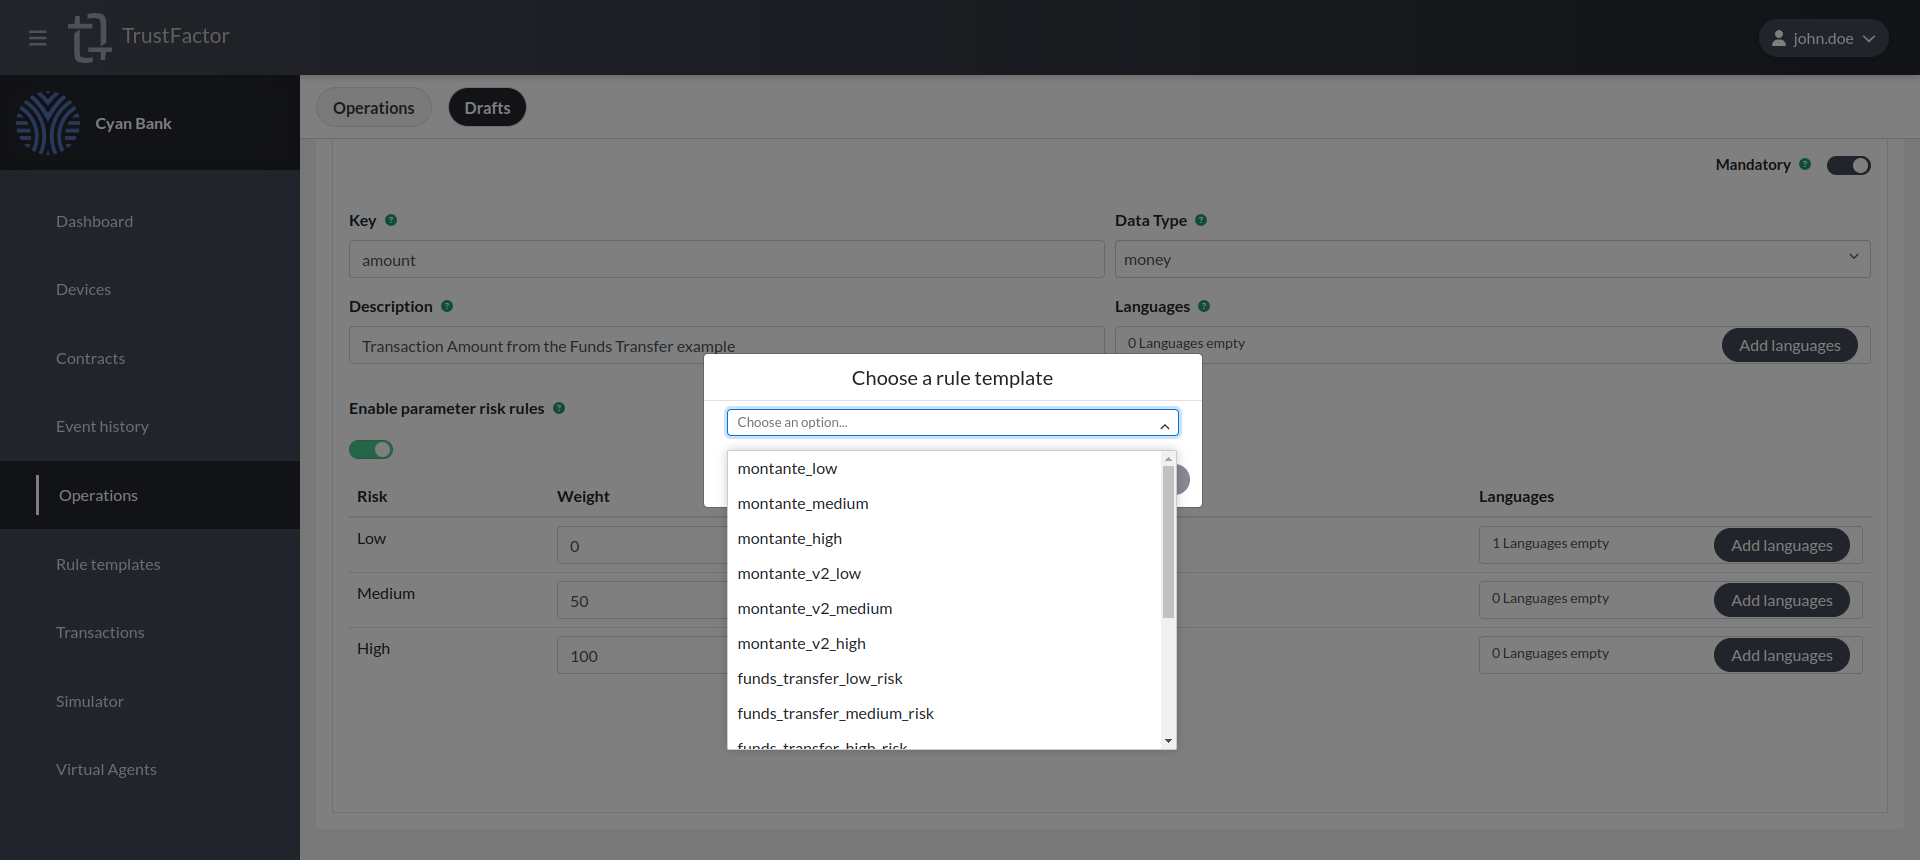
After adding a risk rule, you can define the messages for each risk level, in every supported language you selected in the operation's basic setttings screen.
You can also assign the weight for these parameters, which will be used in the risk calculation for the whole transaction.
Step: Messages
The Messages screen is where we define the messages shown in the first screen of the decision workflow in the mobile app.
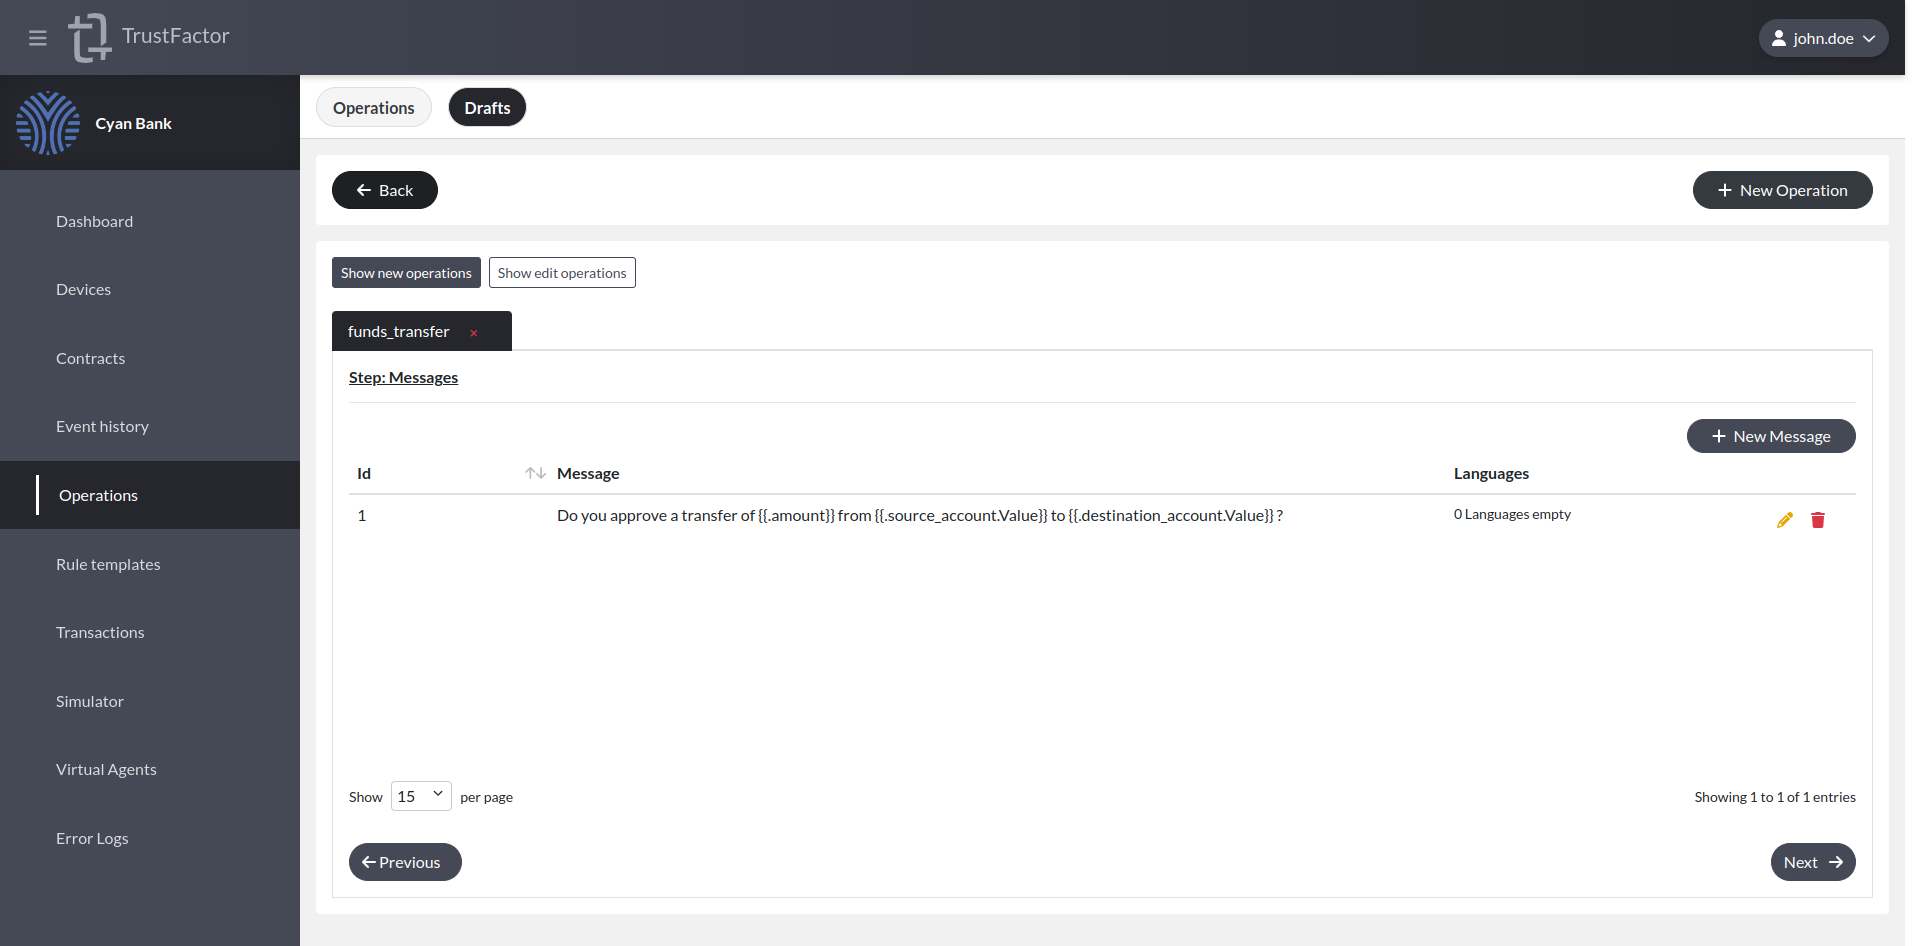
We could add more messages to the operation that can be used in different scenarios by referencing the message ID.
First we define the message for the default language.
After setting the default language message, we must also define the translations for the other languages set in the application's basic settings by pressing Add languages. When you are done configuring the message, 0 languages empty should appear on the messages table.
Referencing Parameter Values in Messages
It's possible to reference parameter values in messages by using Go templates. If you have a parameter with the key username, you can reference the passed parameter in the message by doing {{.username.Value}} . This is straightforward for all parameter types except money. For money you may want a formatted string with the amount and the currency and for that you need to use just the parameter key (e.g. if you have a money parameter with key amount, then you reference it with {{.amount}}).
A full message can be something like:
Do you wish to proceed with funds transfer of {{.amount}} ?
We can now click Next -> in the bottom left corner to proceed.
Step: Risk Settings
Here you can configure risk settings for this operation. There are no parameters so there are no settings there. We can however enable Risk Modules.
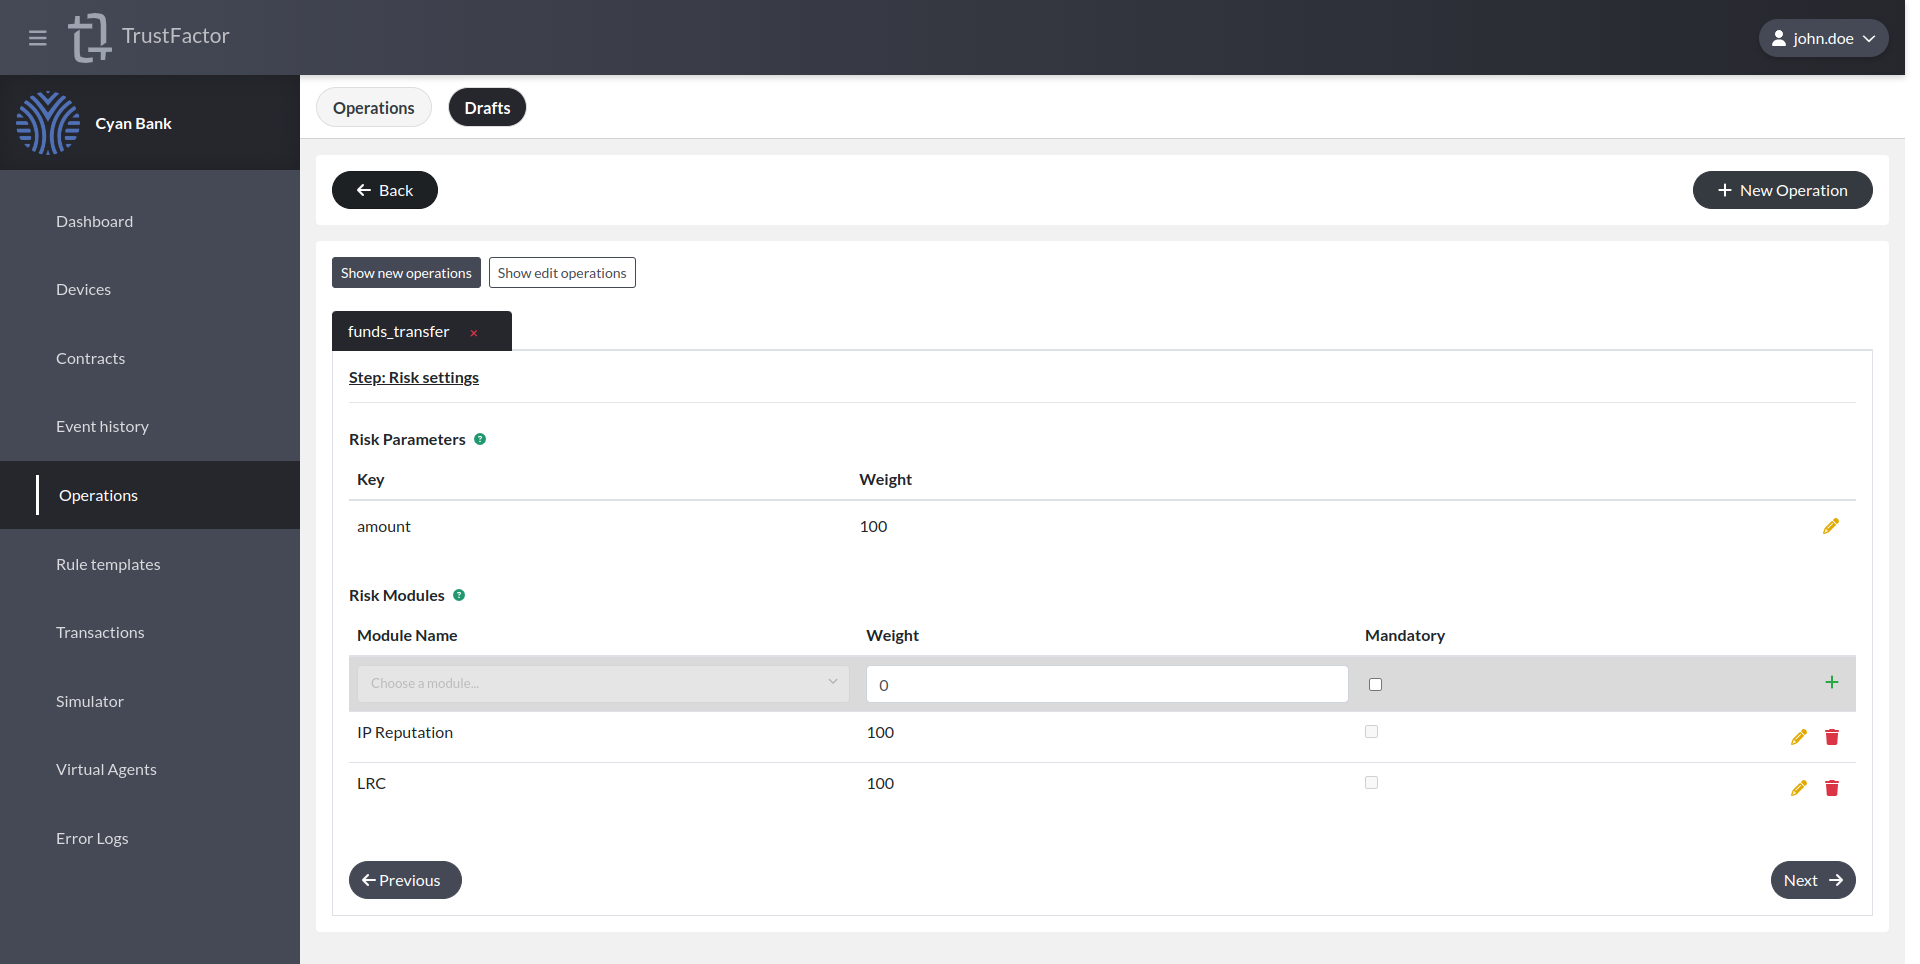
An operation may define static rules for transaction's risk based on parameters' values. In order to use static rules for a parameter the operation should define:
- The weight of the parameter for the whole transaction's risk evaluation;
- Risk conditions to apply to the parameter for each risk level;
- The expression logic for the parameter for each risk level;
- The risk multiplier for each risk level.
The parameter risk levels will be evaluated from the highest to the lowest. The evaluation stops as soon as a risk level is triggered. The transaction will fail if the parameter's value doesn't fit in any rule.
The transaction's risk level calculation is based on defined thresholds:
- 33 points or less - Low risk
- 34 points or more but less than 68 points - Medium risk
- 68 points or more - High risk
The transaction's risk score is calculated using the following formula:
Σ(params risk score) + Σ(modules risk score)
The risk score for each parameter is defined by:
Parameter's weight * Parameter's Risk Level Multiplier
Risk Modules
There are currently two risk modules supported:
- LRC - The Location Risk Calculator leverages the geo-location of the user to assess the risk of the transaction. This requires either the client IP (of the application user) who created the transaction to be sent in CreateTransaction metadata or the coordinates (latitude and longitude).
- IP Reputation - The IP Reputation risk module uses our threat intelligence sources to flag suspicious source IP addresses. This requires the client IP (of the application user) who created the transaction to be sent in CreateTransaction metadata.
You can select one or both and assign a weight to it. This weight will be factored in the risk calculation for the transaction as defined in the section above. Normally we select both and assign a weight of 100 to each so that if either of these modules are triggered the transaction is bumped to high risk immediately.
Submission
When you are ready and get no errors on the validation step, you can then create the operation.
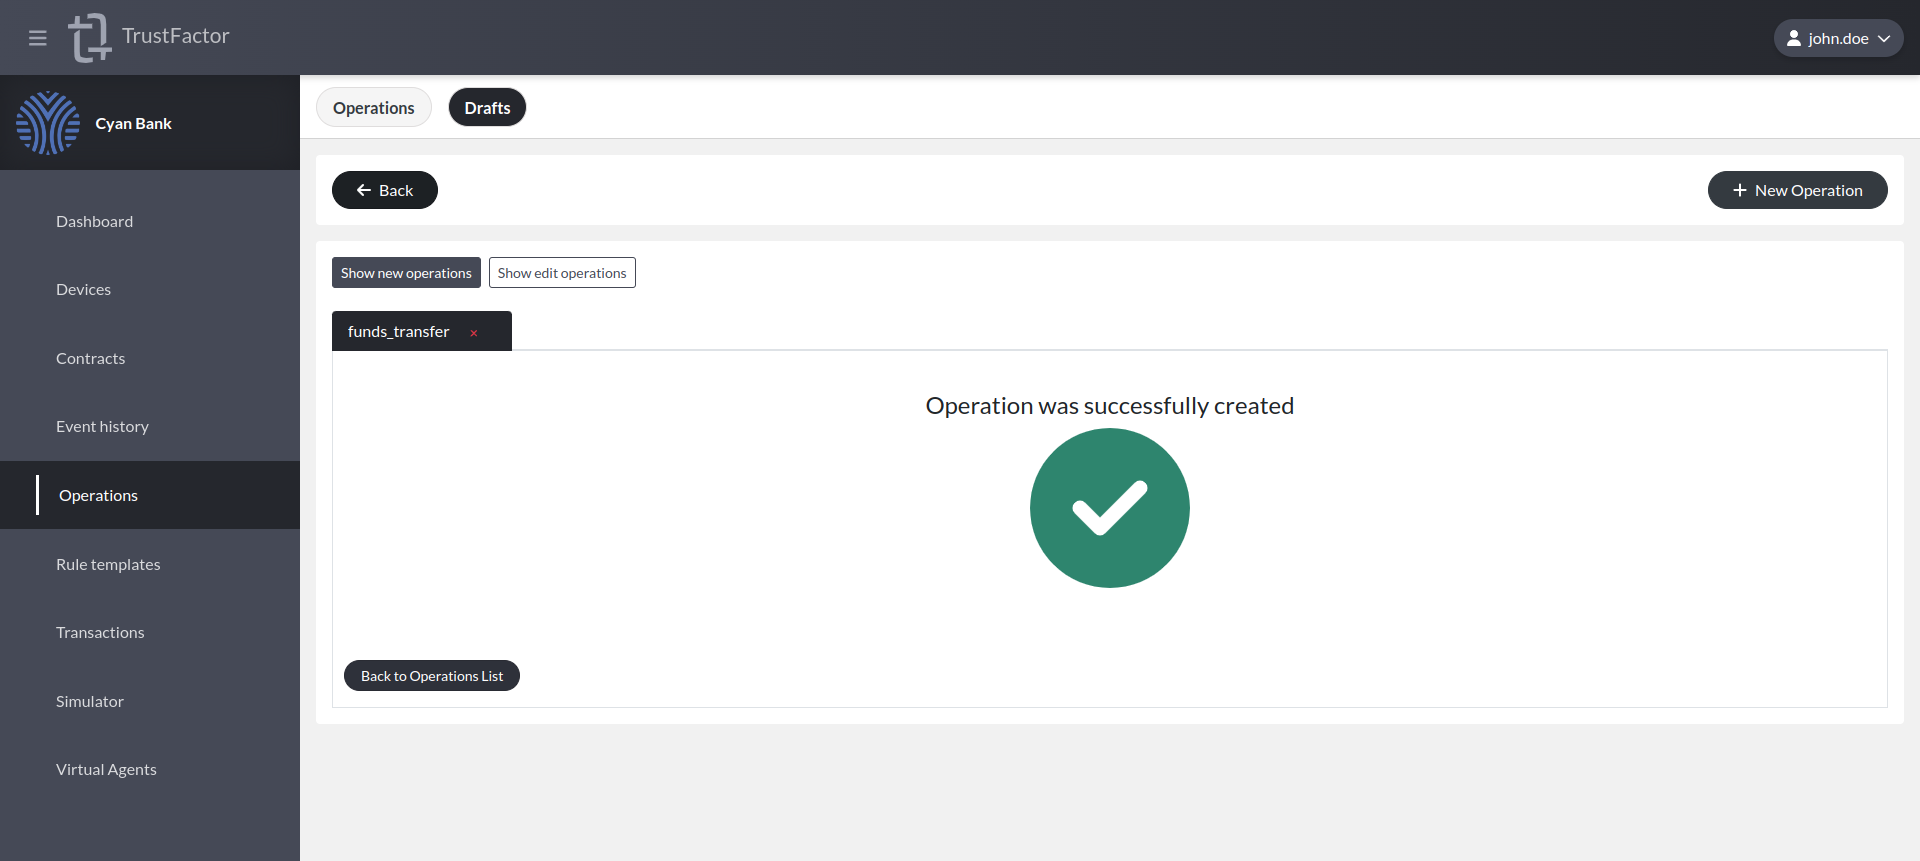
After creating the operation, you can use the Simulator to check what the authentication request will look like for a given user.
Examples
In order to explore operations usage, we will set a few common scenarios that can leverage TrustFactor operations for multi-factor authentication.
Example 1 - Password-less Login
One of the most common use cases for TrustFactor is password-less login. This is one of the simplest operations to configure on TrustFactor, as it usually does not have any parameters, just a simple message like "You have requested to log in on <application> using <username>. Do you wish to proceed?".
The first thing we need to do is access the Operations menu in our application and press + New Operation. This opens the basic configurations screen for operations as shown below.
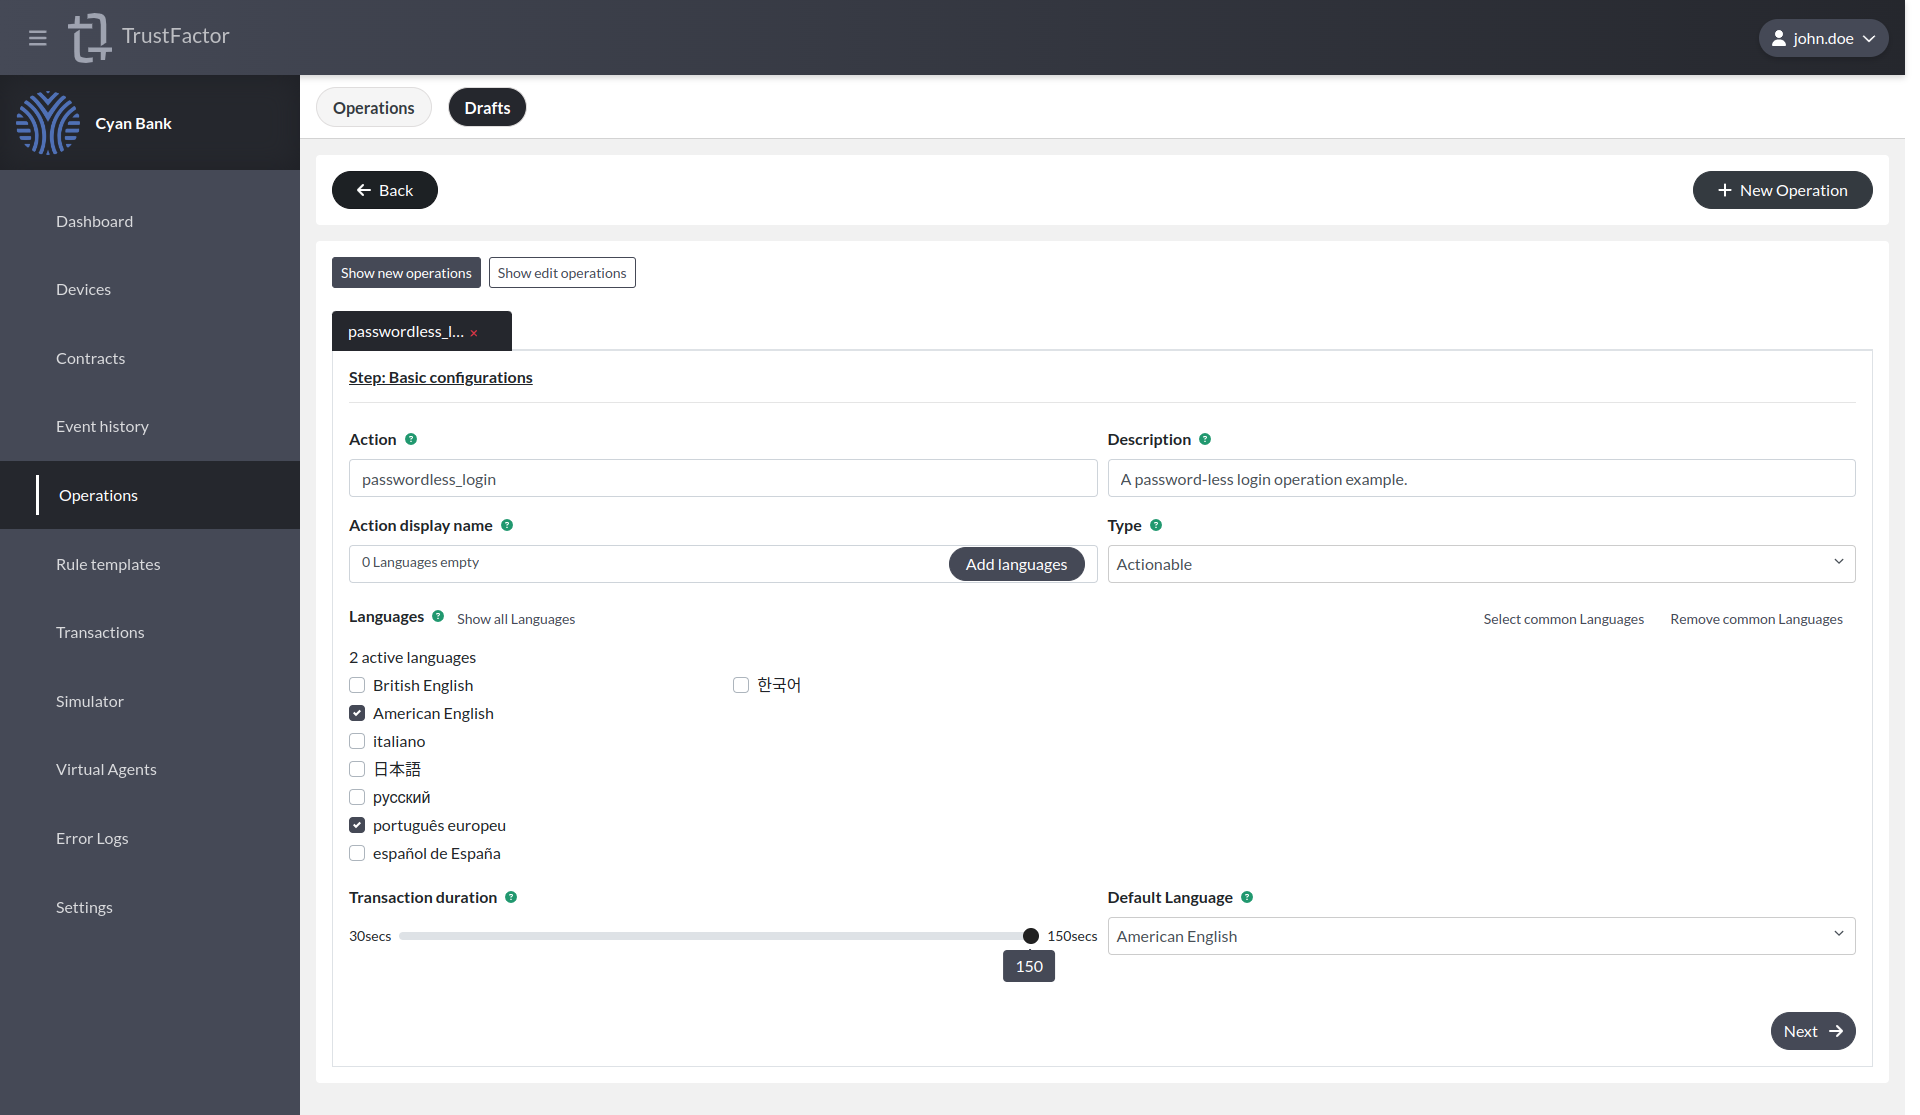
Step: Basic Settings screen
For the password-less login example, let's configure two languages: Portuguese and American English.
Action
For this example, we'll just set it to passwordless_login.
Action display name
We set "Password-less Login" for the American English language and "Autenticação sem Password" for the Portuguese language.
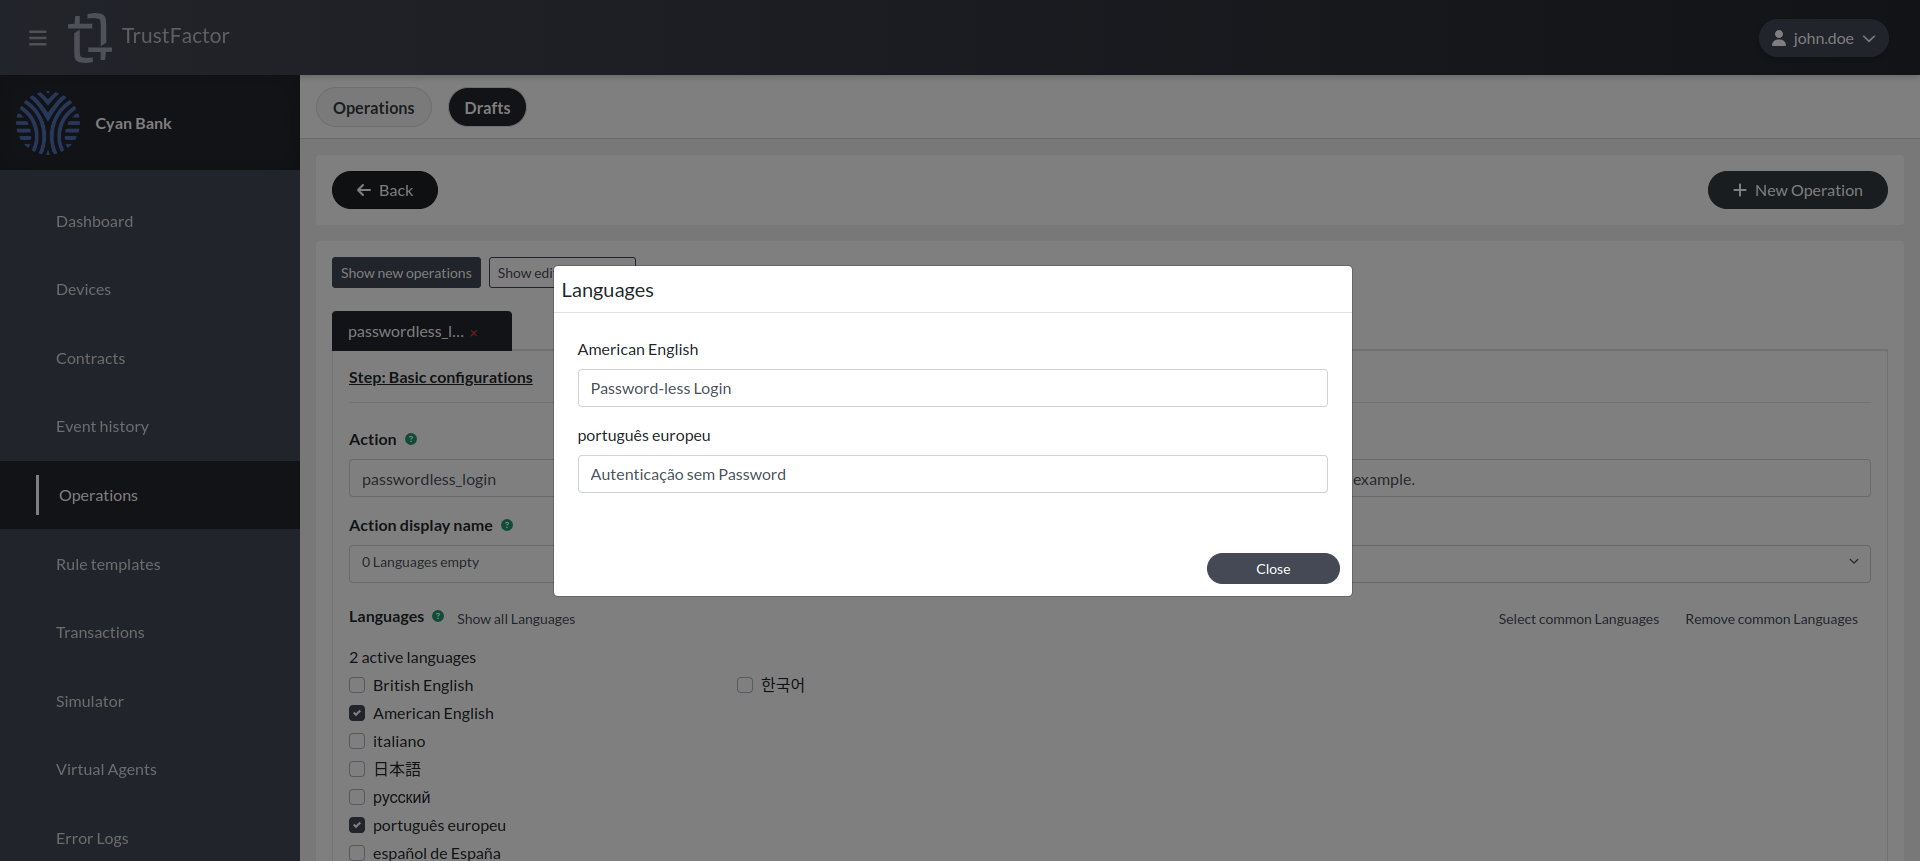
Description
A password-less login operation example.
Type
For the password-less login example, this must be set to Actionable, because we want to know if the user approved or rejected.
Default Language
We'll set the default language to American English.
The basic configurations screen for password-less login should look like the screenshot below. We can now proceed to the next step by pressing the Next -> button in the bottom left corner.
Step: Parameters
For this example, we will not define any parameter, so we just press the Next -> button.
Step: Messages
For the password-less login example, we must define one message for each language defined in the operation's basic settings.
We could more messages to the operation that can be used in different scenarios by referencing the message ID.
First we define the message for the default language.
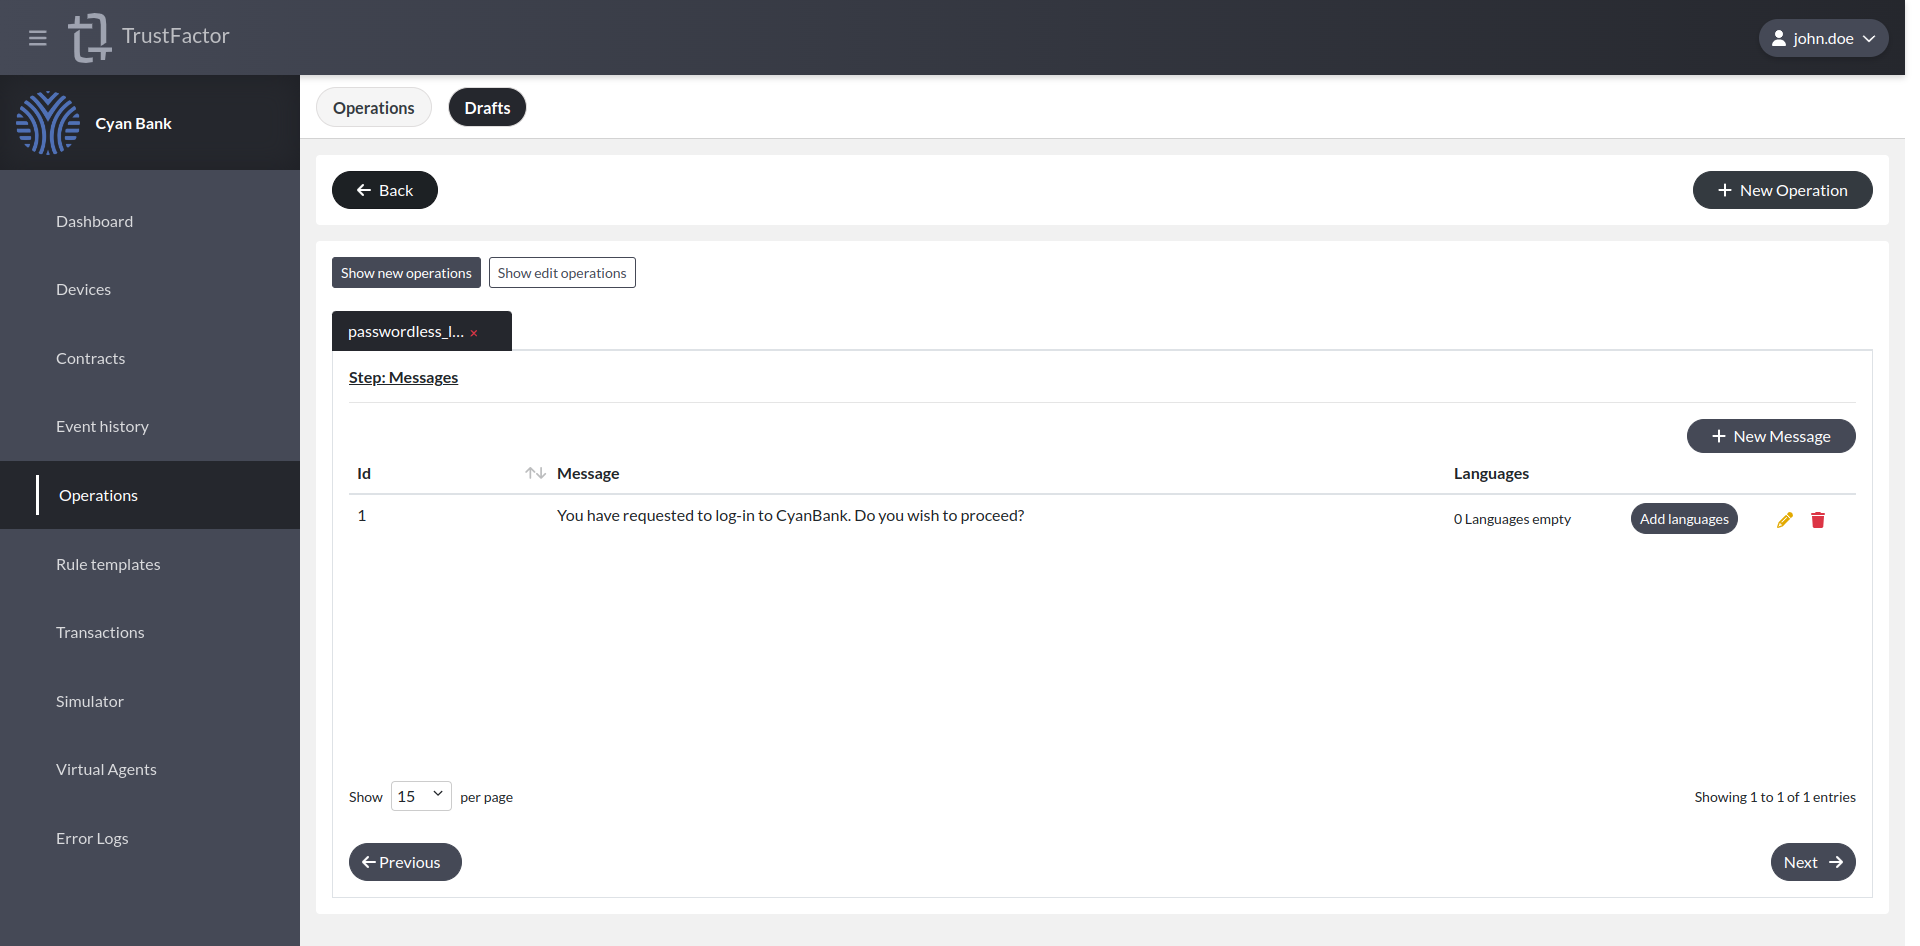
After setting the default language message (American English), we must also define the translations for the other languages set in the application's basic settings by pressing Add languages. When you are done configuring the message, 0 languages empty should appear on the messages table.
We can now click Next -> in the bottom left corner to proceed.
Step: Risk Settings
Here you can configure risk settings for this operation. There are no parameters so there are no settings there. We can however enable Risk Modules.
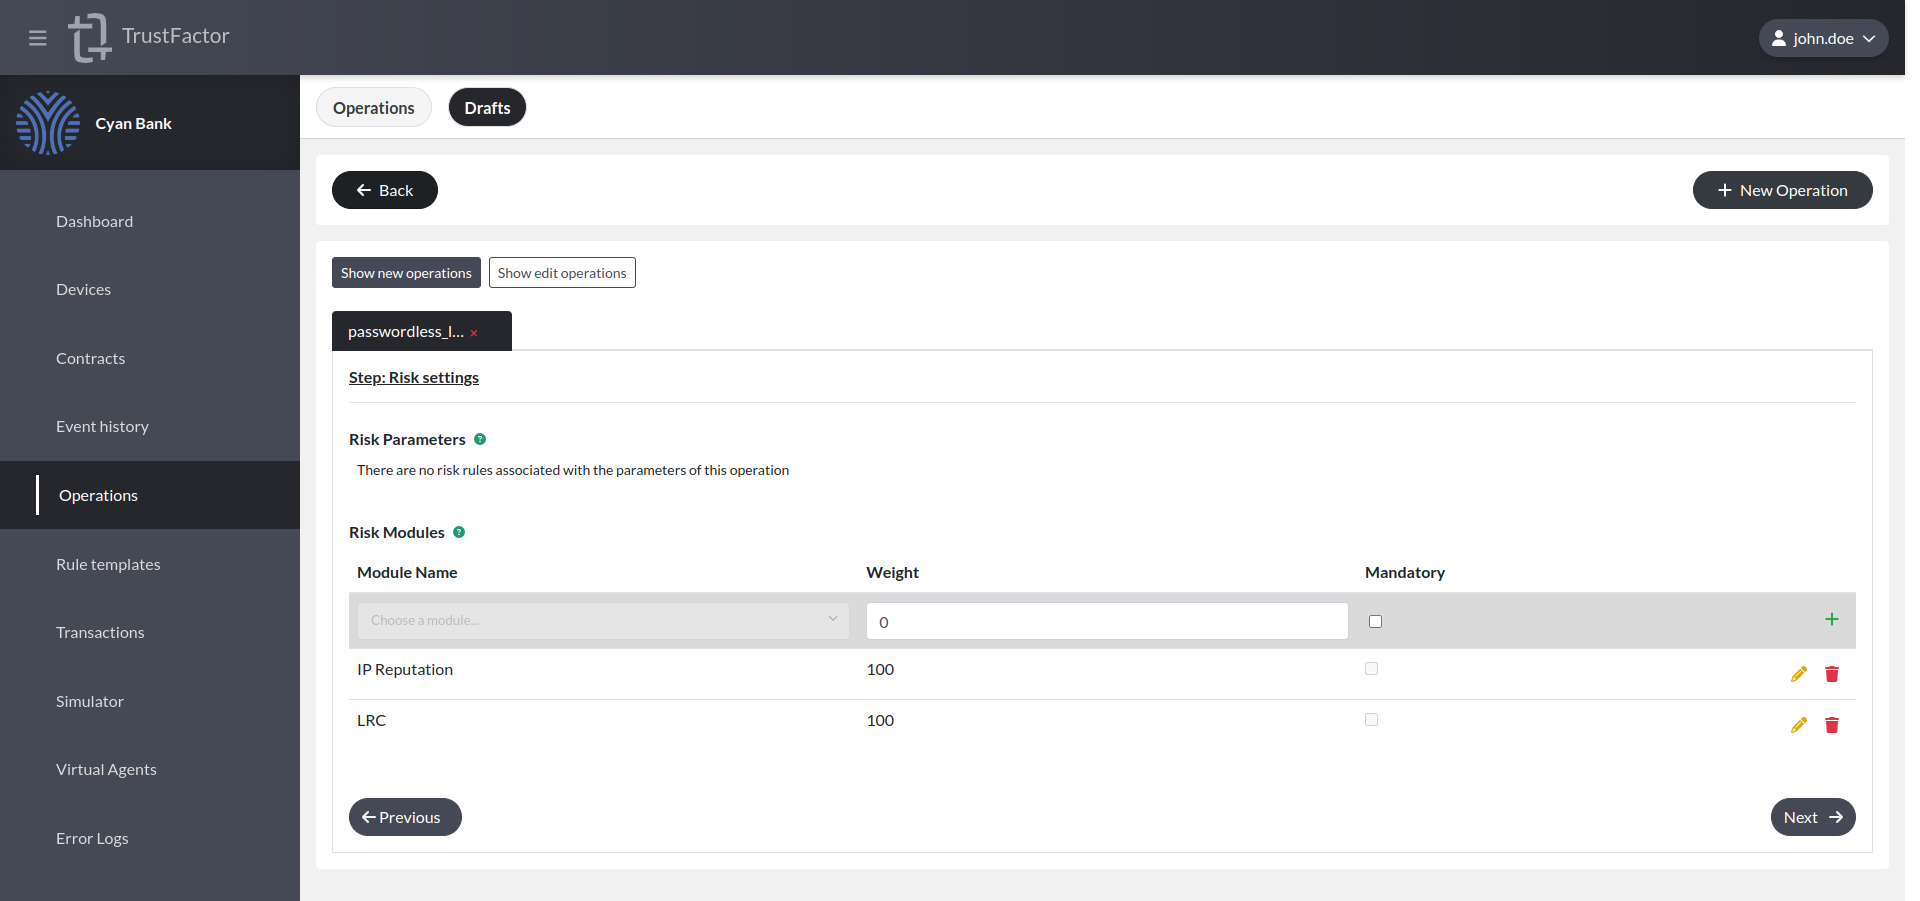
An operation may define static rules for transaction's risk based on parameters' values. In order to use static rules for a parameter the operation should define:
- The weight of the parameter for the whole transaction's risk evaluation;
- Risk conditions to apply to the parameter for each risk level;
- The expression logic for the parameter for each risk level;
- The risk multiplier for each risk level.
The parameter risk levels will be evaluated from the highest to the lowest. The evaluation stops as soon as a risk level is triggered. The transaction will fail if the parameter's value doesn't fit in any rule.
The transaction's risk level calculation is based on defined thresholds:
- 33 points or less - Low risk
- 34 points or more but less than 68 points - Medium risk
- 68 points or more - High risk
The transaction's risk score is calculated using the following formula:
Σ(params risk score) + Σ(modules risk score)
The risk score for each parameter is defined by:
Parameter's weight * Parameter's Risk Level Multiplier
Risk Modules
There are currently two risk modules supported:
- LRC - The Location Risk Calculator leverages the geo-location of the user to assess the risk of the transaction. This requires either the client IP (of the application user) who created the transaction to be sent in CreateTransaction metadata or the coordinates (latitude and longitude).
- IP Reputation - The IP Reputation risk module uses our threat intelligence sources to flag suspicious source IP addresses. This requires the client IP (of the application user) who created the transaction to be sent in CreateTransaction metadata.
You can select one or both and assign a weight to it. This weight will be factored in the risk calculation for the transaction as defined in the section above. Normally we select both and assign a weight of 100 to each so that if either of these modules are triggered the transaction is bumped to high risk immediately.
Submission
When you are ready and get no errors on the validation step, you can then create the operation.
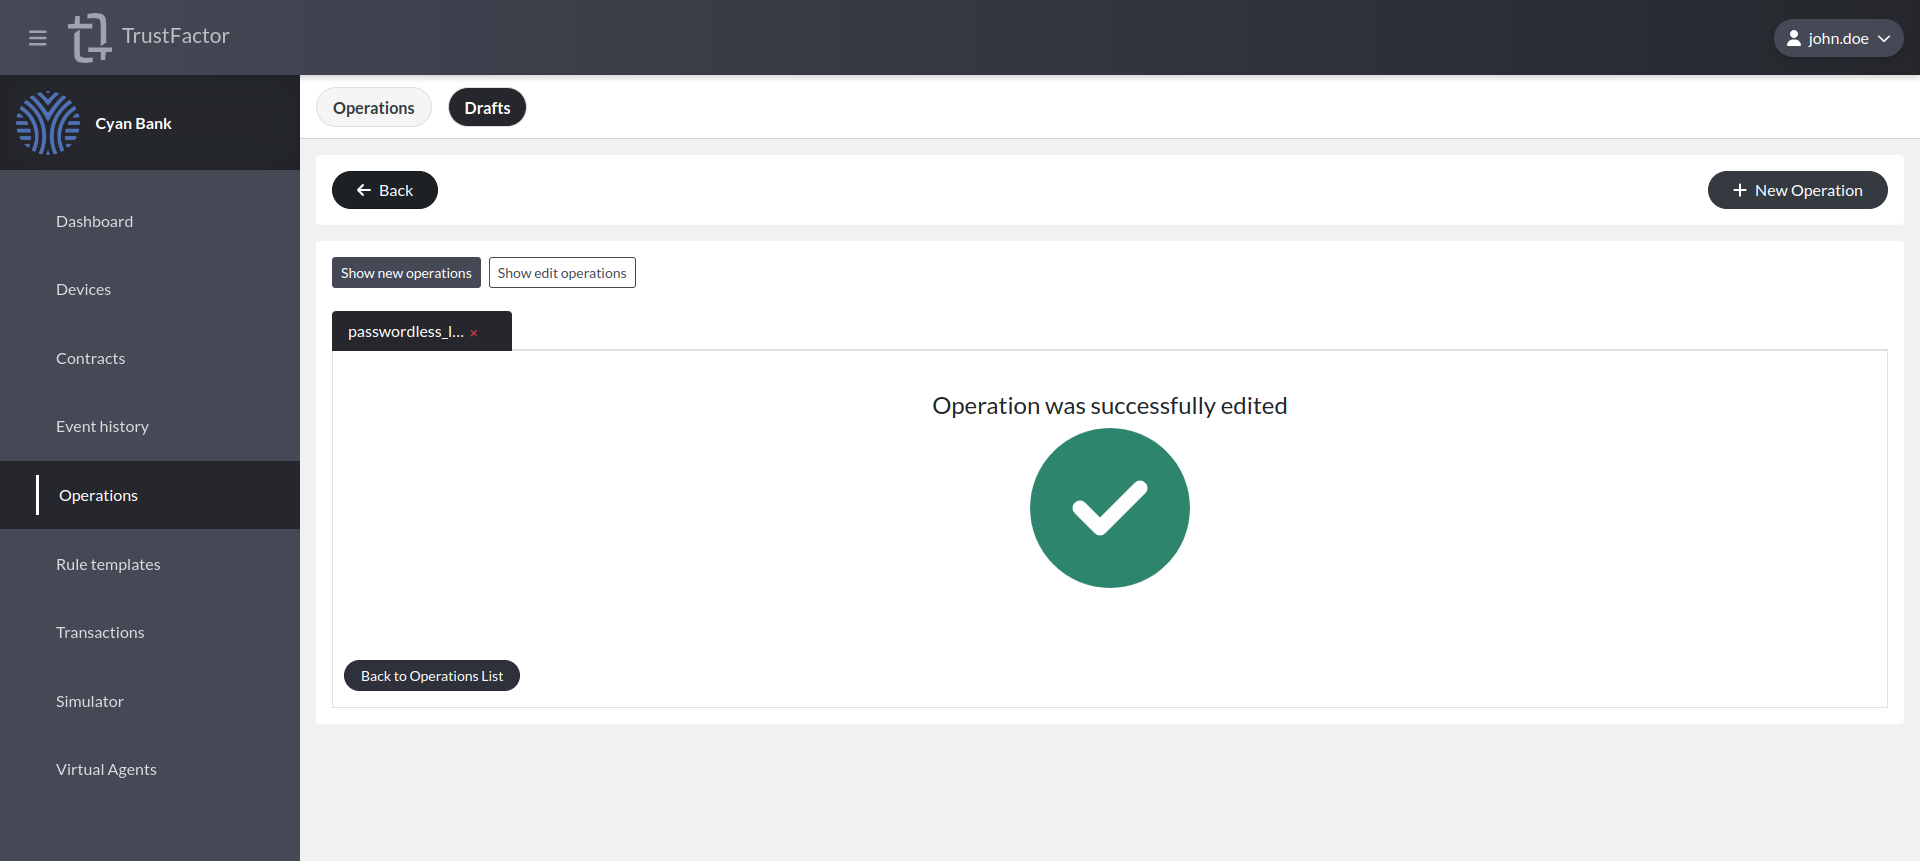
After creating the operation, you can use the Simulator to check what the authentication request will look like for a given user.
Example 2 - Funds Transfer
In this example we will go through the operation create workflow but now we will define parameters and assign risk rules to them. We will take the previous example defined in Example - Funds Transfer.
Let's go through the operations creation workflow.
Step: Basic Configuration
We define the action, languages, description and proceed to the parameters screen.

Step: Parameters
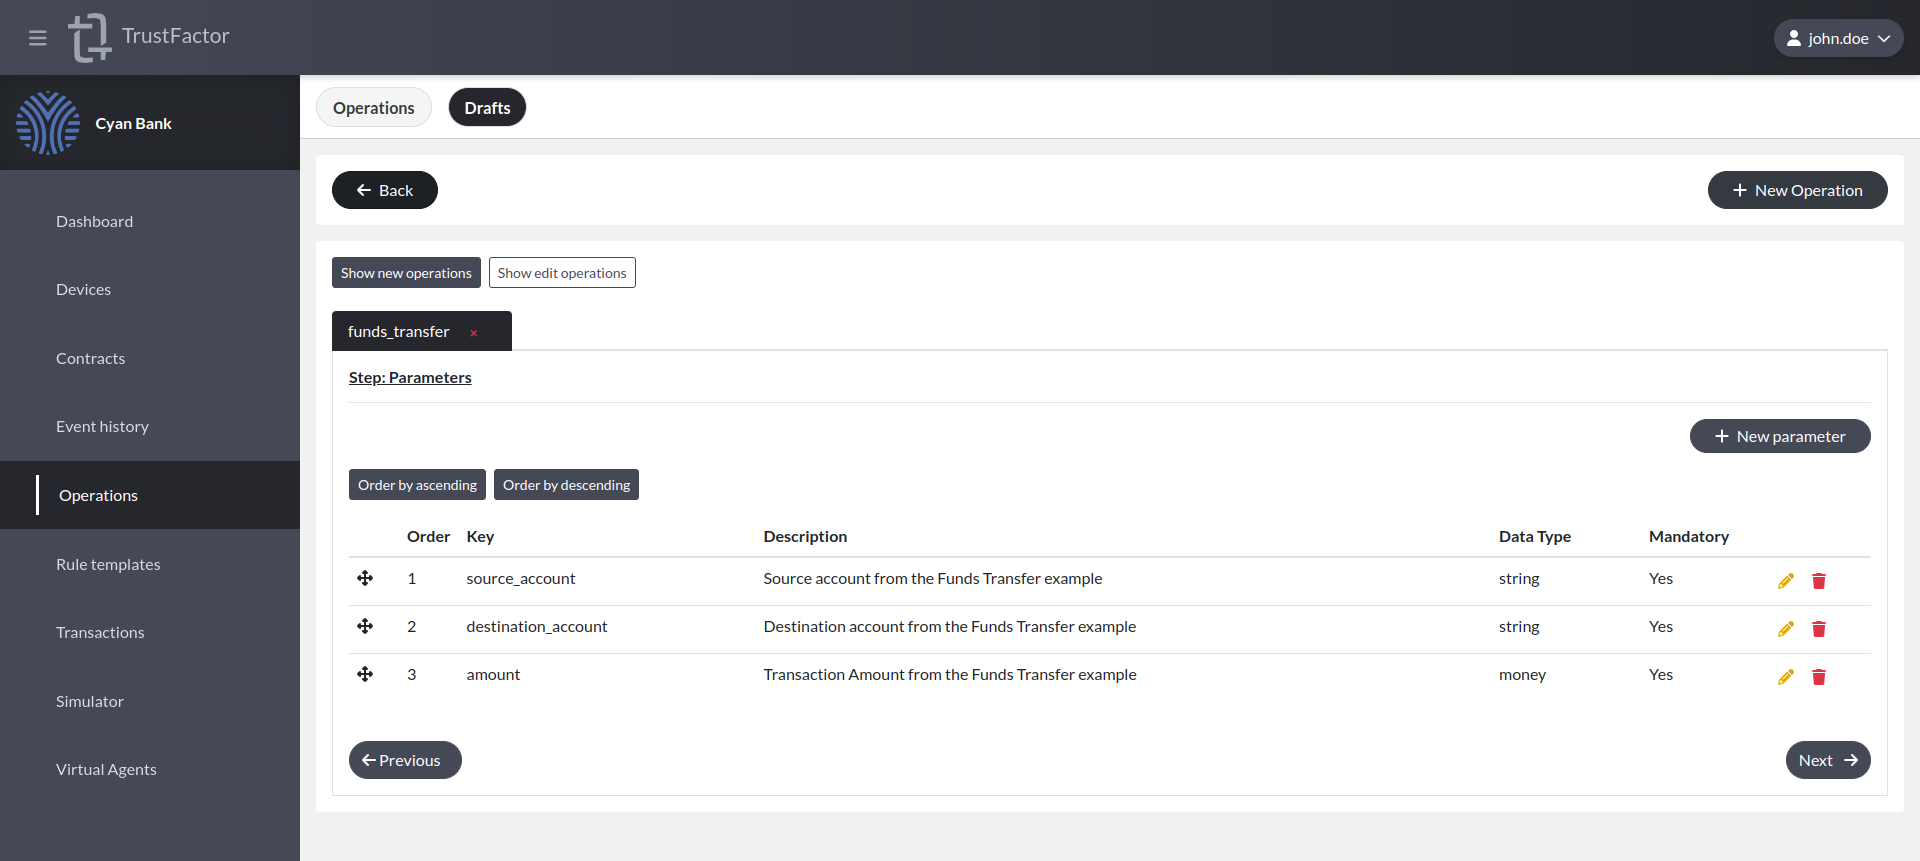
In order to create the Funds Transfer operation, we're going to need to define 3 parameters:
- Source Account
- Destination Account
- Transaction Amount
Source Account
In the parameters screen, choose + New Parameter . This will take you to the parameter creation screen. The first parameter we create is going to define is the source account. Let's fill in the required parameter fields.
- Key -
source_account - Data Type -
string - Description -
Source account from the Funds Transfer example - Default Language Parameter Label (english) -
Source Account
This parameter does not have any risk rules associated with it, so we leave the Enable parameter risk rules toggle disabled for this one.
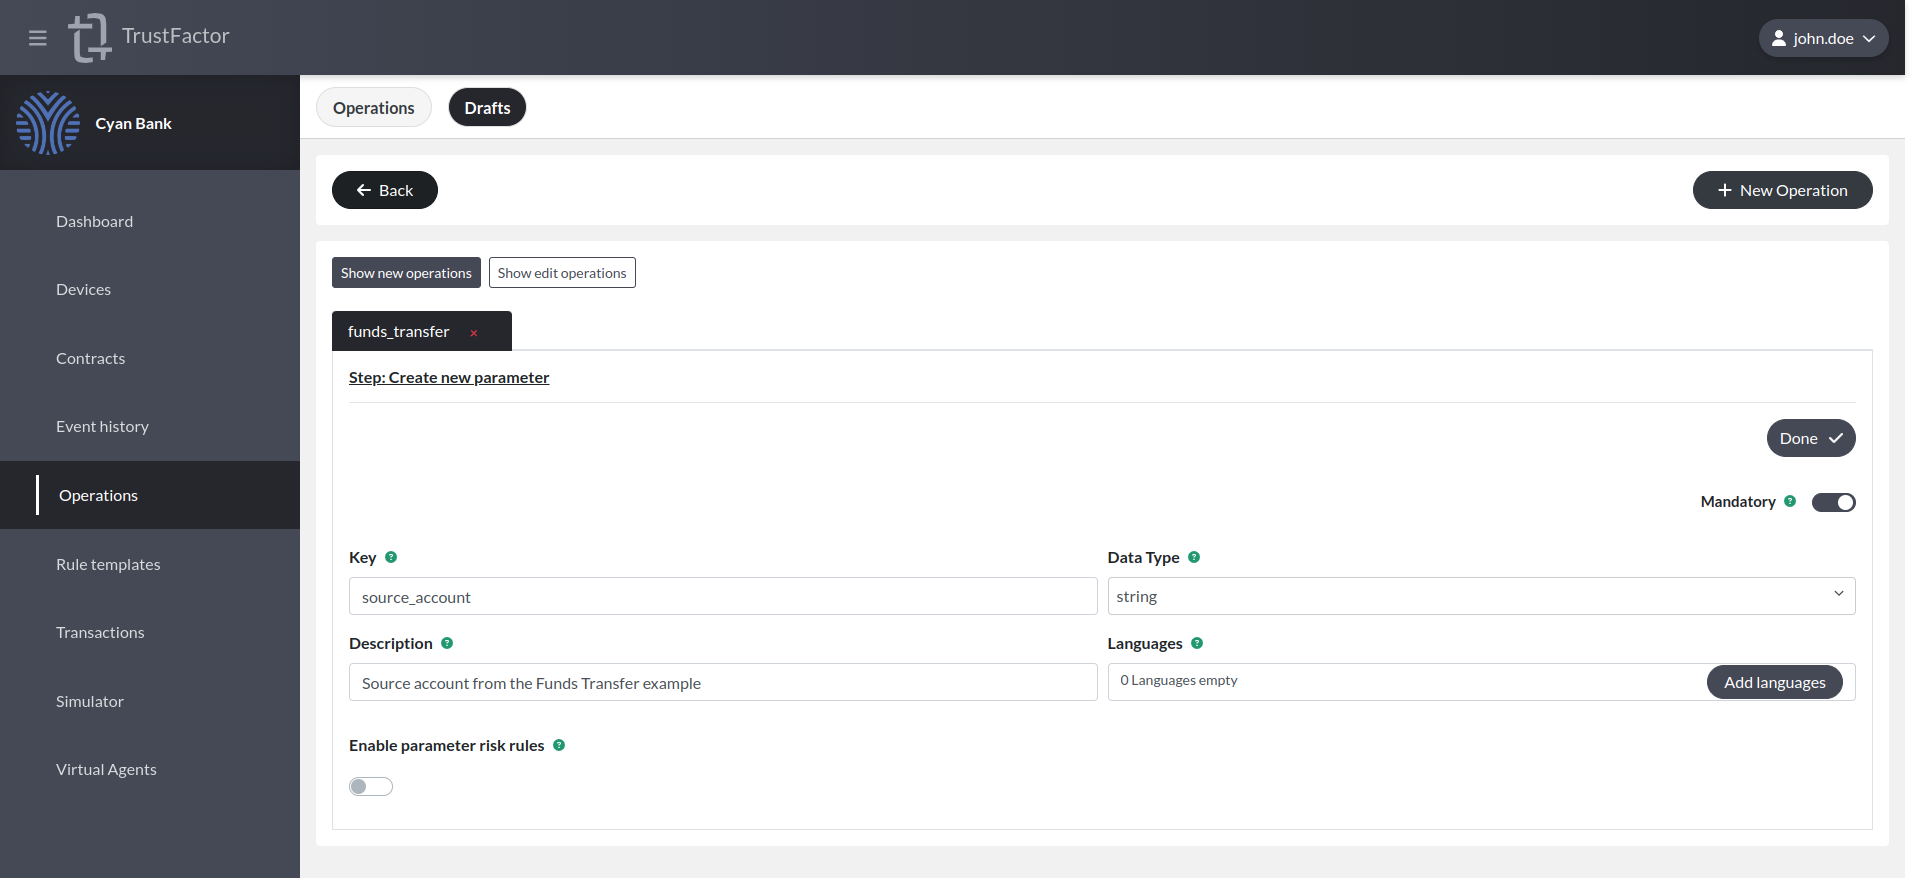
Now we can press Done to save the parameter.
Destination Account
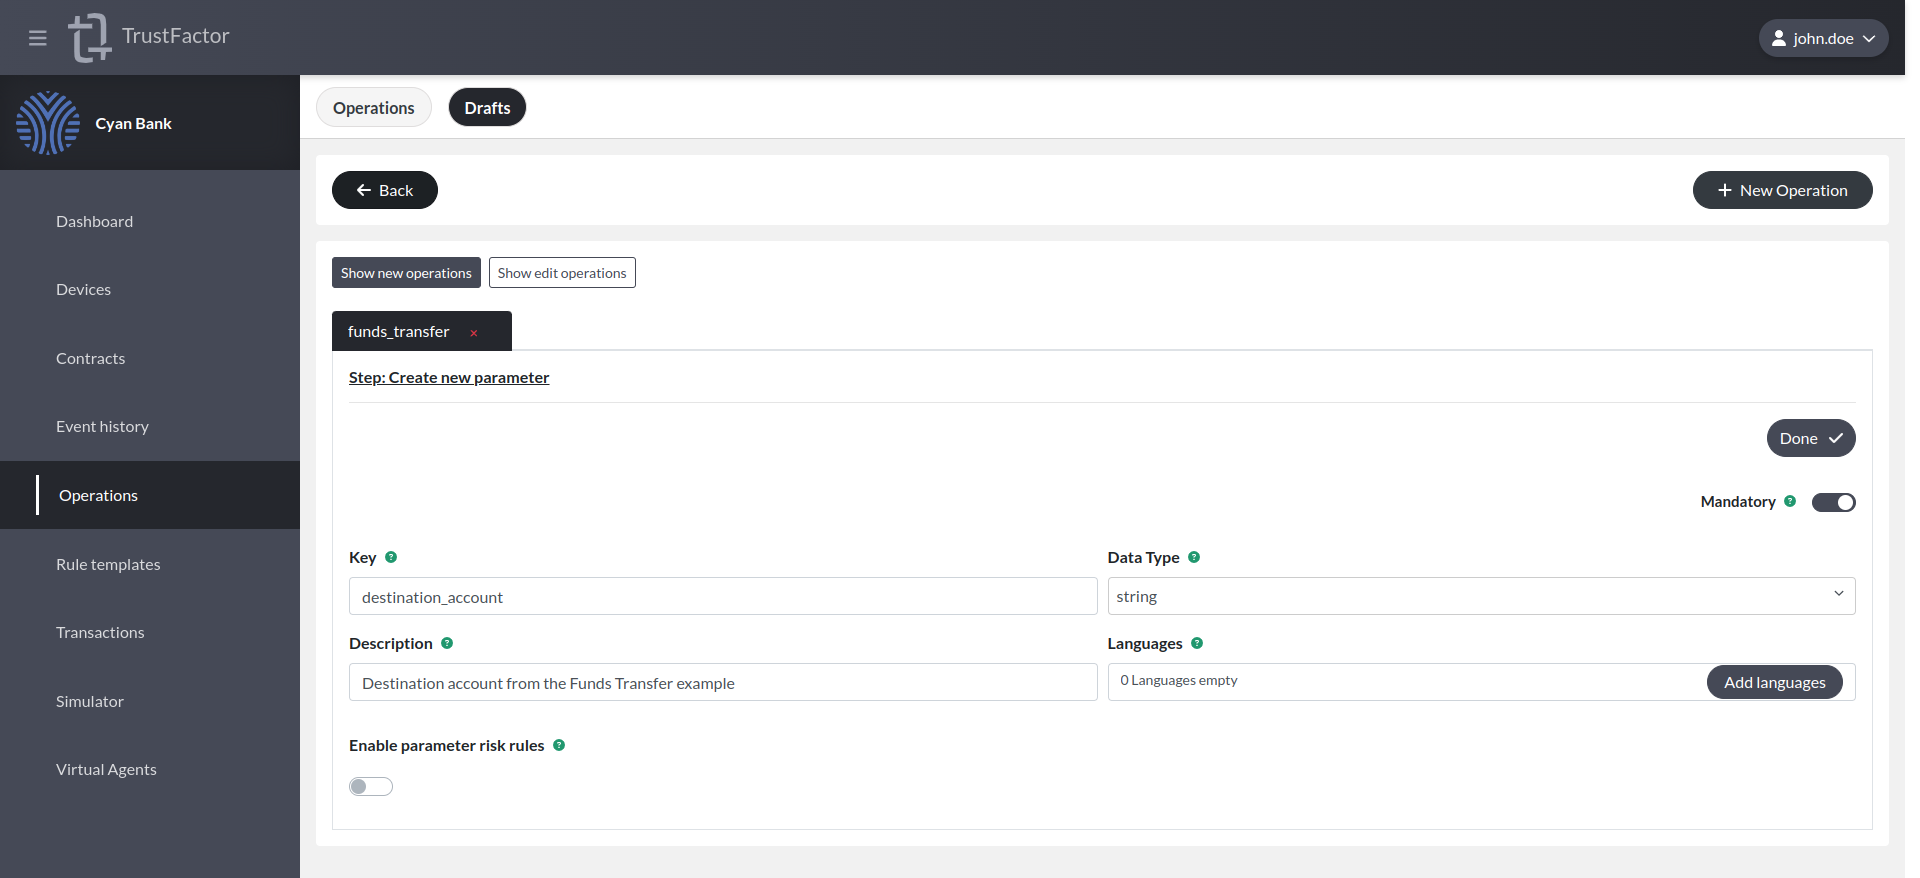
Now we go ahead and create the other two parameters. Destination Account is next and it's definition is very similar to Source Account:
- Key -
destination_account - Data Type -
string - Description -
Destination account from the Funds Transfer example - Default Language Parameter Label (english) -
Destination Account
Amount
Transaction Amount is the most interesting parameter to create, because it needs risk rules. First we define the required parameters:
- Key -
amount - Data Type -
money - Description -
Transaction Amount from the Funds Transfer example - Default Language Parameter Label (english) -
Transaction Amount
Now we need to press Enable parameter risk rules to use the rule templates we created earlier on this operation. When you press the button, you should see a screen as shown below:
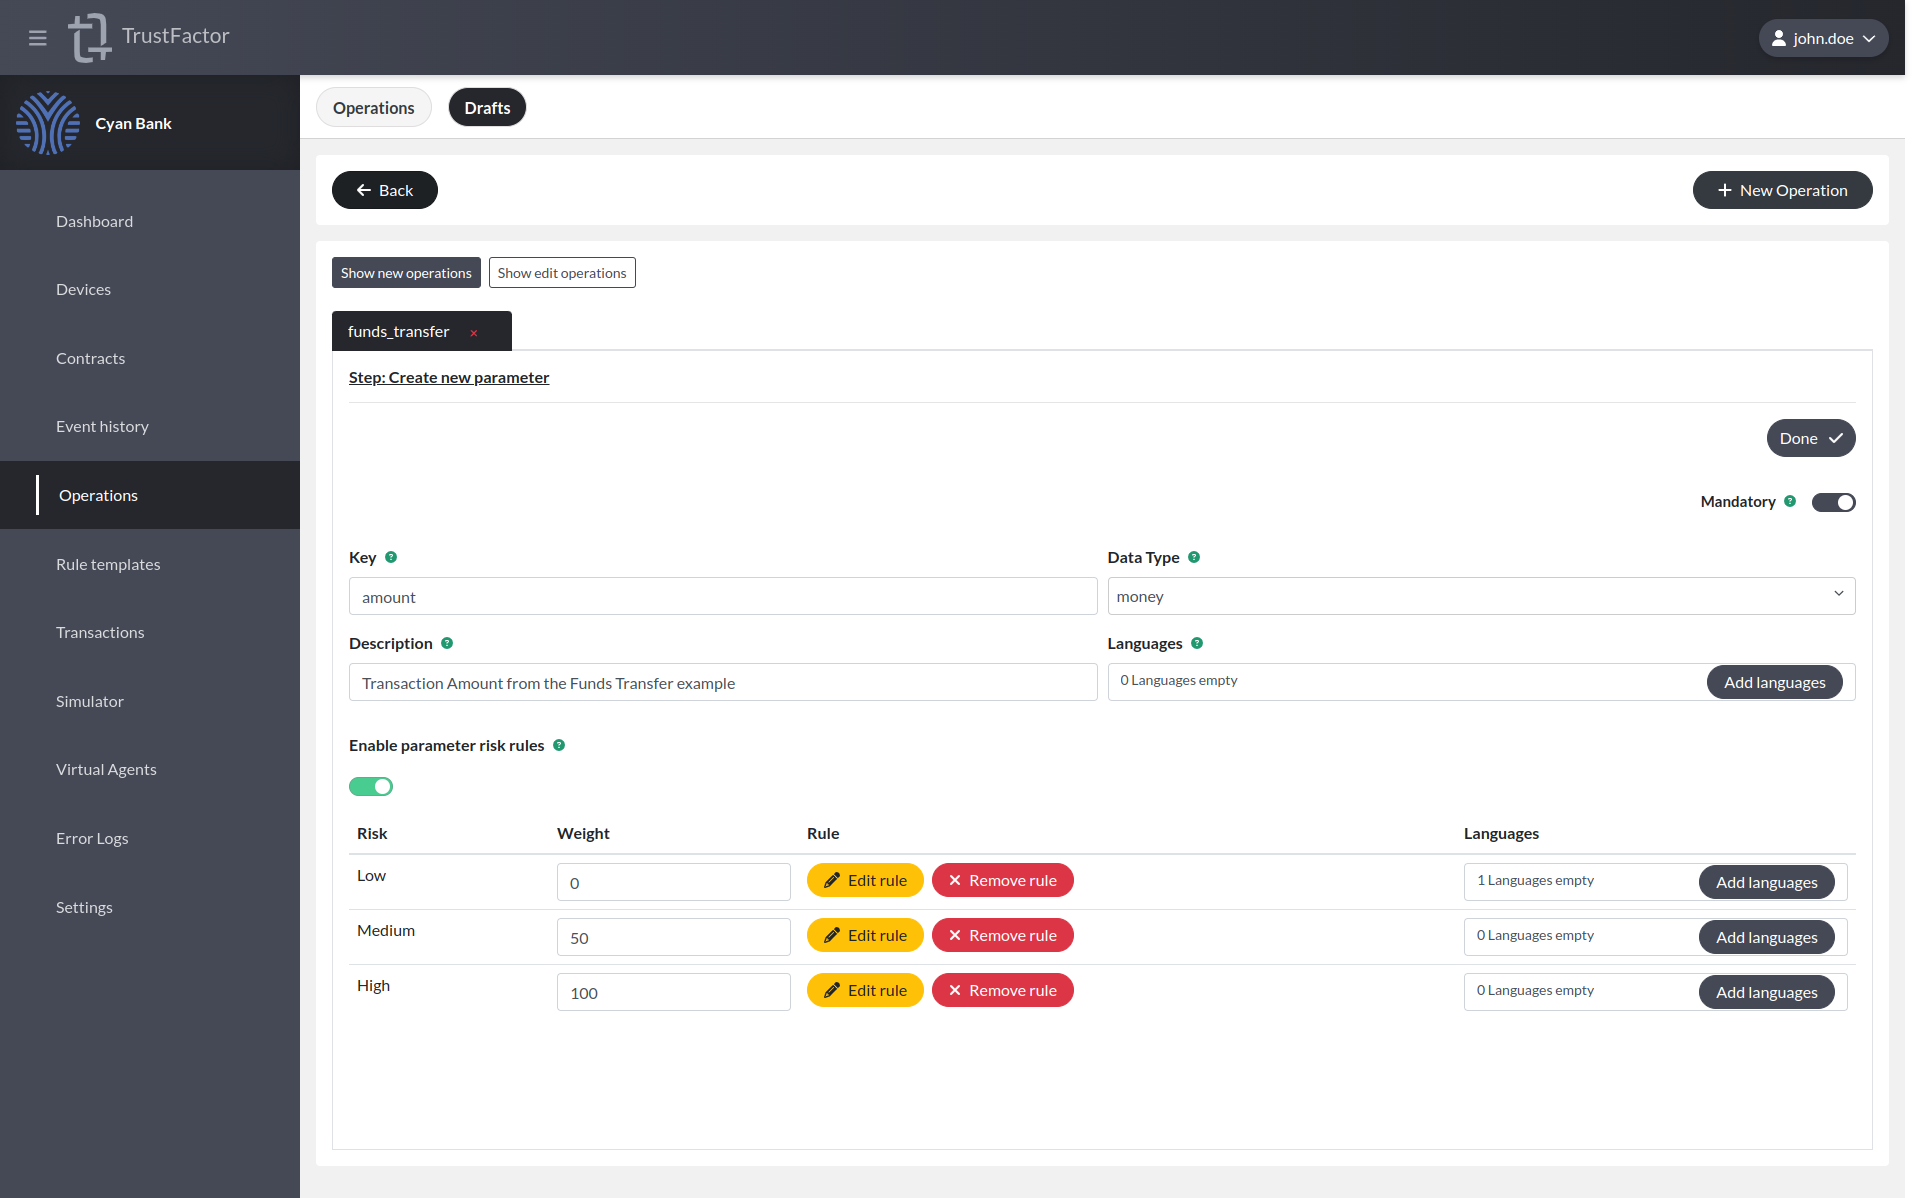
We need to configure the rules that trigger each risk rating (low, medium and high) as explained in the Risk Settings Section. For low risk, we're going to use the rule funds_transfer_low_risk that was created earlier. When low risk transactions are created, we don't want to show any risk message above the parameter, but we do for medium and high risk so let's configure those by setting the rule template and then pressing the Add languages button to add the risk message to be shown. For medium risk, let's add the message Please validate the transaction amount before proceeding. For high risk, we add Attention: High Transaction Amount! Please validate before proceeding.
After pressing Done, you will see all of the parameters defined as shown in the screenshot below.
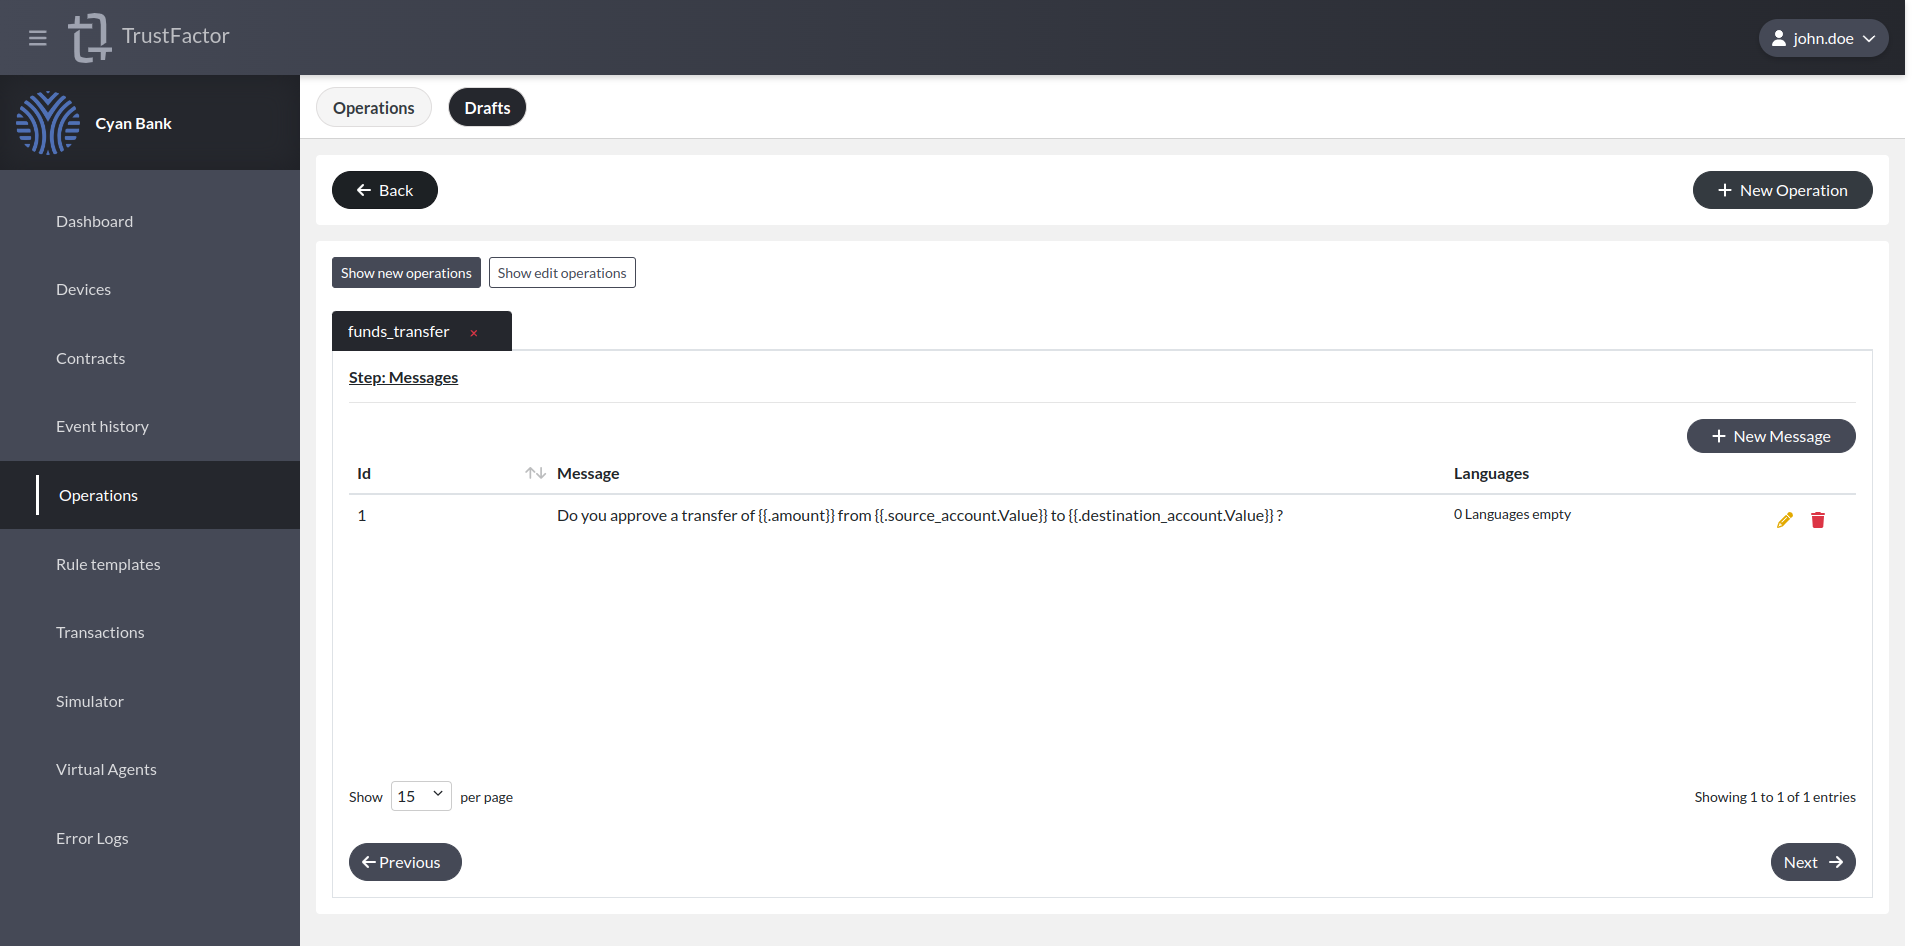
Step: Messages
In the messages screen, we can reference the parameter values in order to include them in the message using Go templating as shown below. Later we will reference this Message Identifier (1) in the simulator to see what will be shown to the end user.
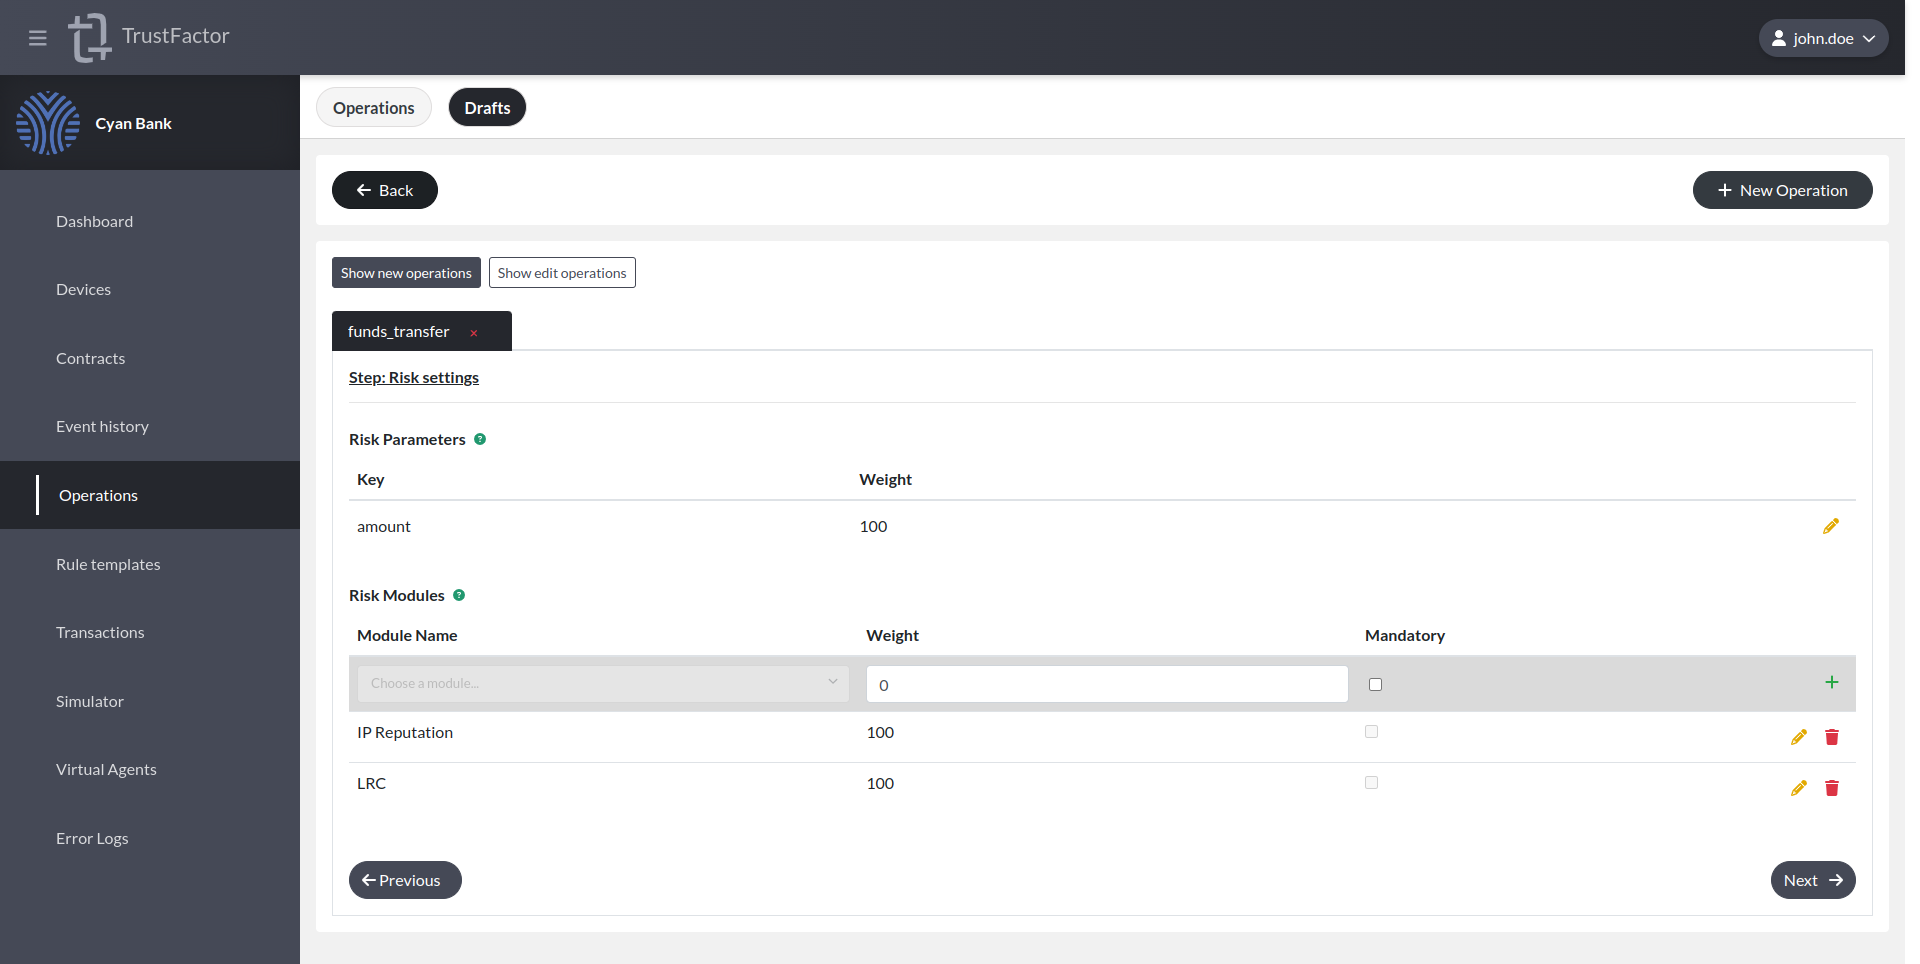
Step: Risk Settings
In the risk configurations screen, we set the weight of the Amount parameter to 100. This means that if the amount parameter is flagged as high risk, the whole transaction is rated high risk. If we lower this weight we may create scenarios where a high risk parameter only causes the transaction to be rated medium risk, but this is not what we want in this case. We also add LRC and IP Reputation risk modules with weight set to 100 because if either module flags the transaction we want it to be high risk as well.
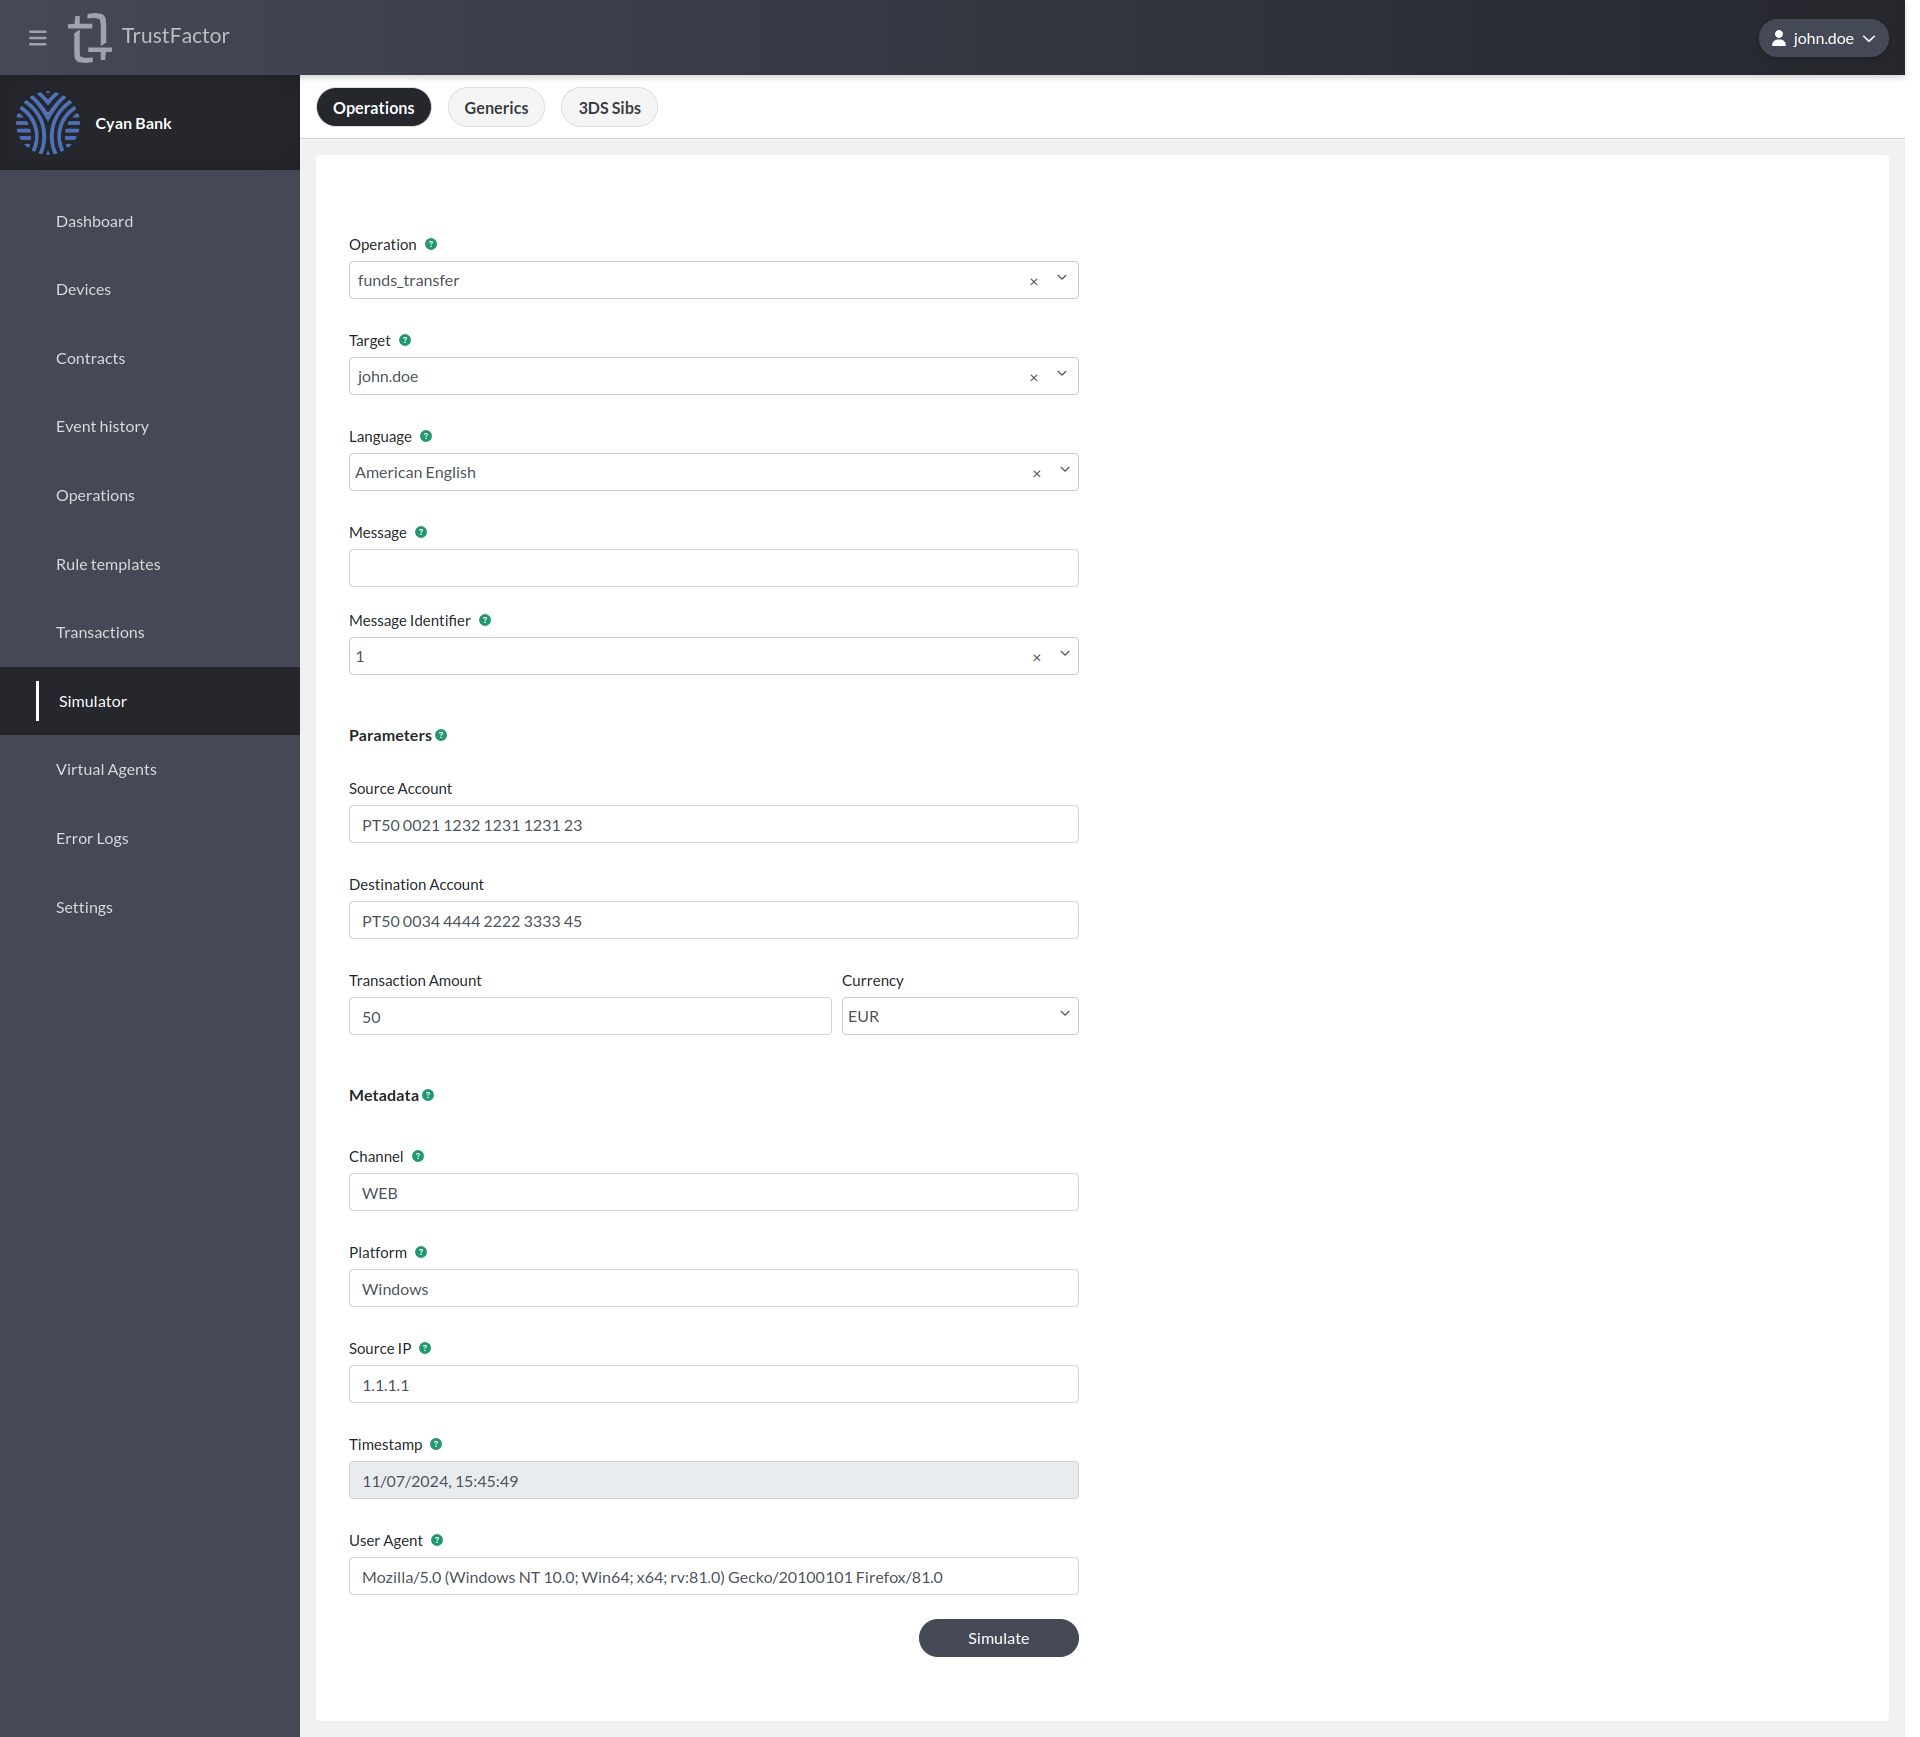
Simulator
If we use the Simulator on the newly created transaction, we can see how it will be shown to the end user. We select the funds_transfer operation and now the form includes the parameters we need to fill out. We pick a user and set the amount to 50 EUR.
When we press Simulate at the bottom, we will see both screens render as they would be shown to that user:
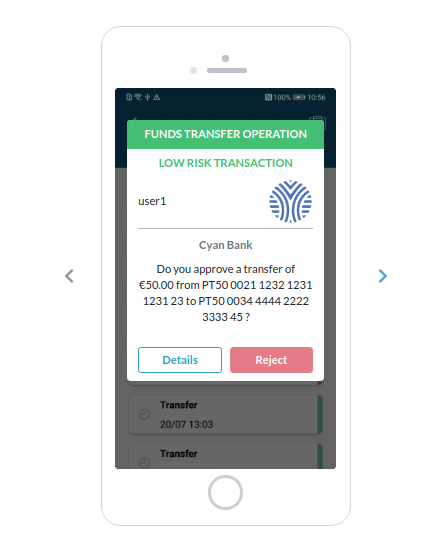
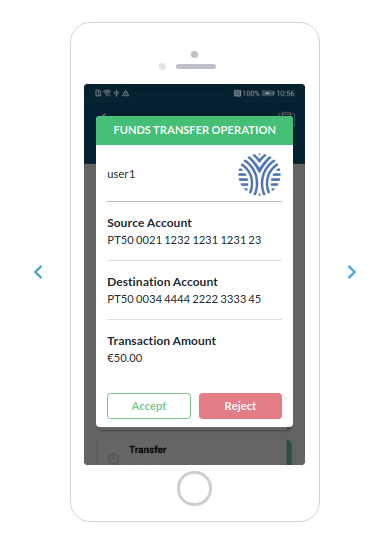
This shows no risk messages whatsoever above the parameters. Now let's try to trigger a medium risk transaction by setting the amount to US $600 .
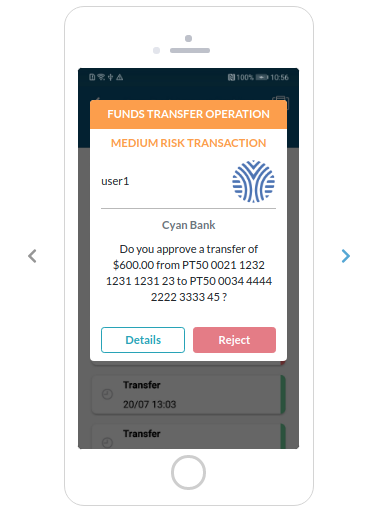
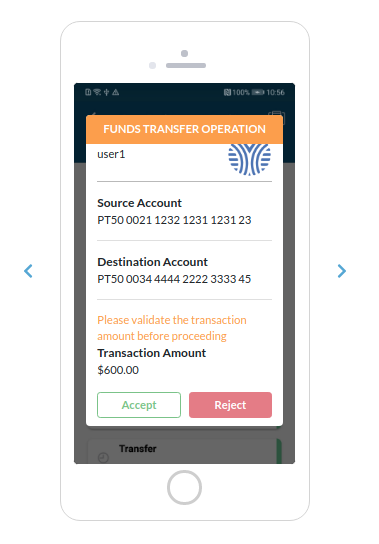
The medium risk message is now shown above the Transaction Amount parameter as we defined it. Now let's try 10.000 EUR to trigger the high risk rule.
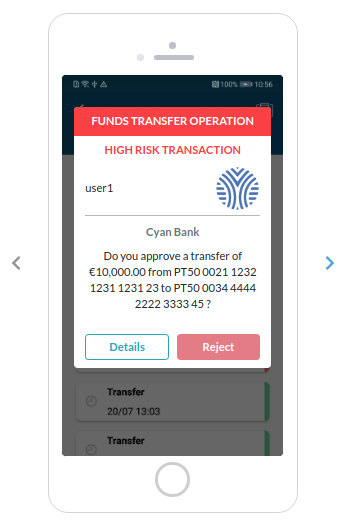
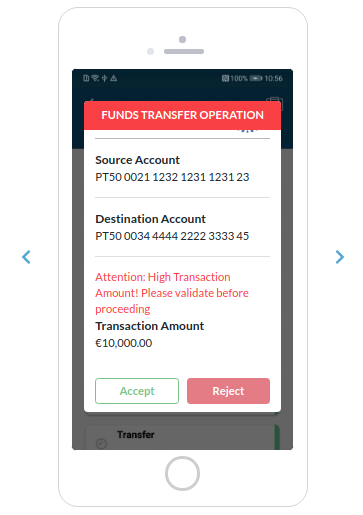
This shows use the High Risk rule has been triggered and the message is shown accordingly.